
Parts
No parts specified.
-
-
Aeroqual will provide you with a link or email you the required files
-
Once downloaded, the zip file will contain folders named as each version of ePC
-
Within each folder (based on model number), there will be multiple files which must be copied to a USB stick
-
The USB stick must be formatted as FAT32 with no other files present
-
Place each set of files into SEPARATE USB sticks and label each CLEARLY
-
If the files are used to update the wrong model number (S1A2 versus S1A1E), this will render the ePC inoperable and it cannot be recovered. Aeroqual is not responsible for this type of error.
-
-
-
Reminder that S1A1E and S1A2 require different file sets – failure to update with the correct tool will cause permanent damage to the BIOS which will need to be repaired by Advantech
-
Connect VGA cable from a suitable computer monitor, and keyboard (it can be wireless) into the ePC
-
Insert USB stick into ARK loaded with the required files. Insert USB cable for keyboard (wireless dongle shown in image). Insert Wi-Fi antenna (if available)
-
Apply power to the ePC
-
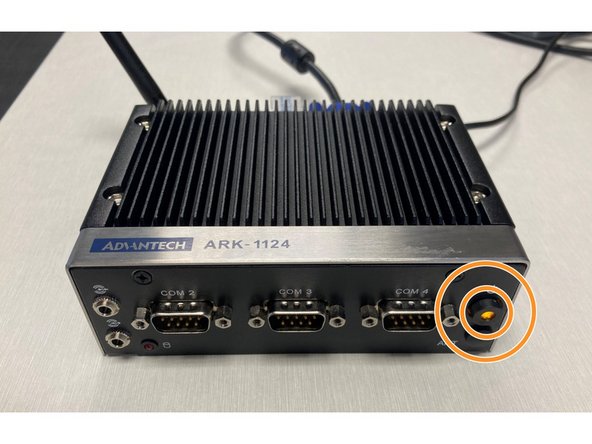
If the ePC LED powers up as ORANGE, Proceed to Step 3. If the LED powers up as GREEN, proceed to Step 4
-
-
-
If the LED powers up as ORANGE, Push the LED button ONCE, which will turn the button to GREEN
-
DO NOTHING
-
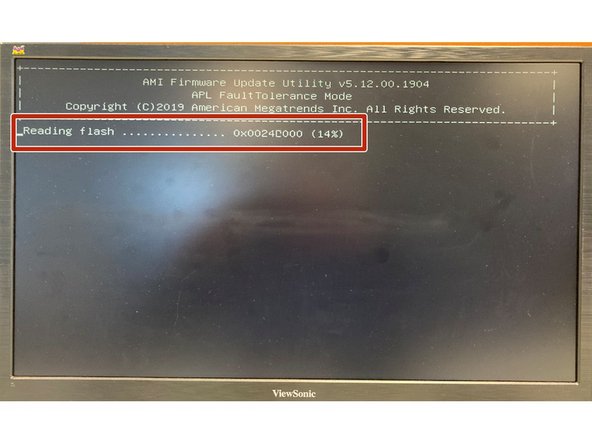
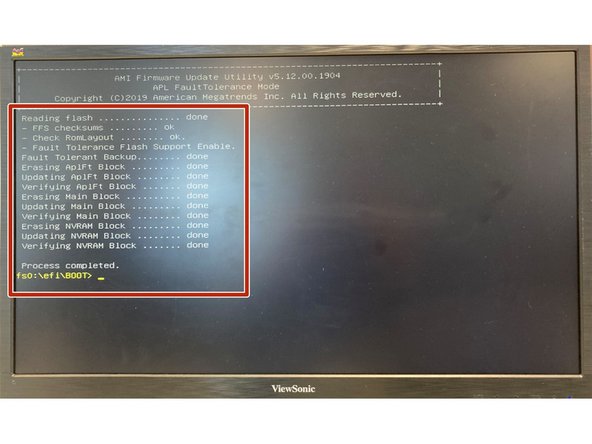
The BIOS will automatically update which will be shown on the screen
-
If no screen is connected, wait for 10 minutes before proceeding to Step 5
-
-
-
Power up the device by connecting 12V. If boot up doesn't automatically occur because the LED is ORANGE, go back to Step 3
-
Repeatedly press the “delete” key until the unit enters the BIOS settings. If this step is missed, or the user is too slow pressing delete – the device will resume normal boot up and will need to be clean shut down again.
-
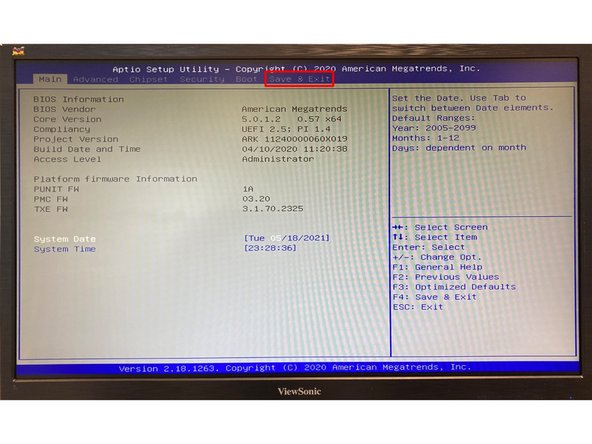
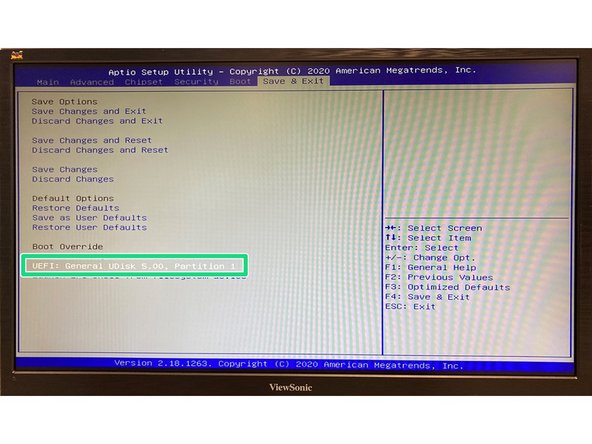
Use the arrow keys to navigate to the “Save & Exit” tab
-
Scroll down to: UEFI: <USB device name/ID> by pressing enter – it will likely be the only option besides the Swissbit SSD – which will show as SFSA030GQ1AA1TO-I-LB-216-STD
-
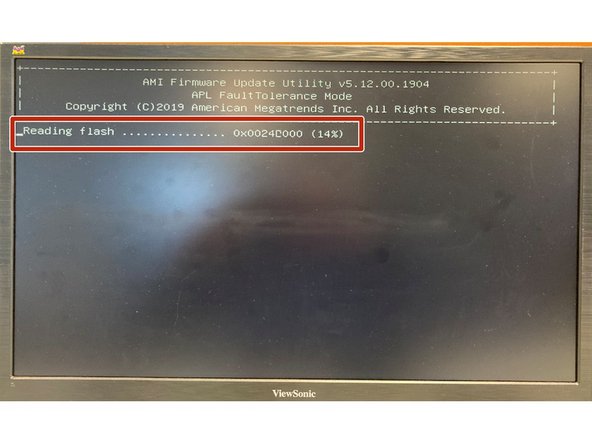
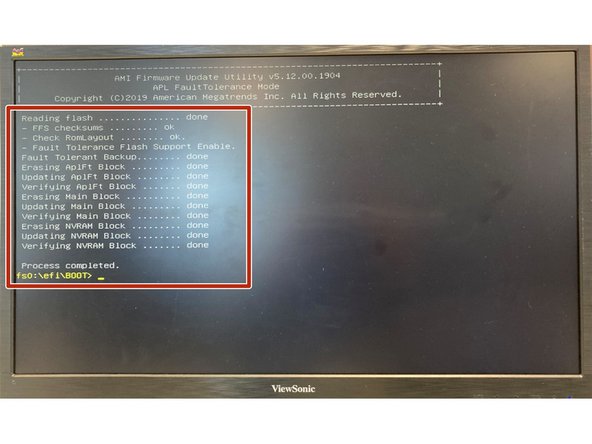
Hit the "Enter" key on the UEFI, which will start the BIOS update.
-
Do not allow for power failure or power cable removal during the update. After the update is finished, the shell will indicate that the update is complete
-
-
-
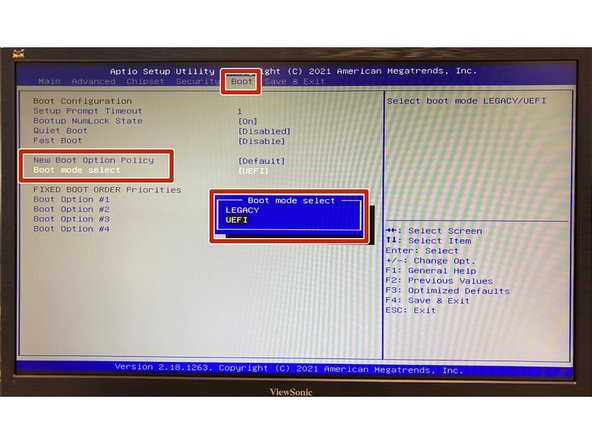
Using the keys, navigate over to the "Boot" Tab, then down to "Boot Mode Select" and Hit Enter
-
Select UEFI and Hit Enter
-
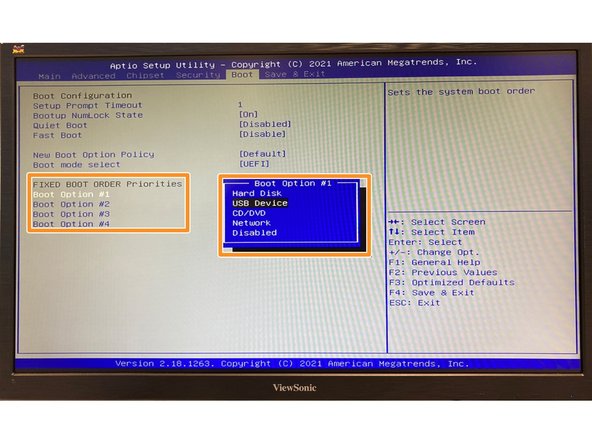
Change "Boot Option #1" to USB Device and Hit Enter
-
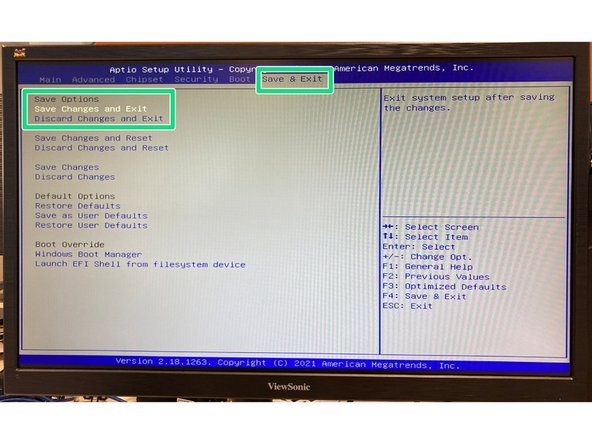
Navigate to Save & Exit, then down to "Save Changed and Exit" and Hit Enter
-
The ePC will now begin the Update process.
-
After the update is complete, re-enter the BIOS mode. Navigate to "Boot" tab and revert the settings. Under "Boot Mode Select" choose "LEGACY" and under "Boot Option #1" choose "Hard Disk". this is the reverse of the above steps.
-
-
-
Do not allow for power failure or power cable removal during the update. After the update is finished, the shell will indicate that the update is complete
-
ARK will boot into the UEFI shell off this device. No extra action is required, as the startup script will begin updating the BIOS.
-
The update takes approximately 5 minutes (allow 10 minutes if proceeding from Step 3)
-
Press the Power button once to power the ePC down.
-
Remove the USB stick
-
Push the power button again to power up the ePC.
-
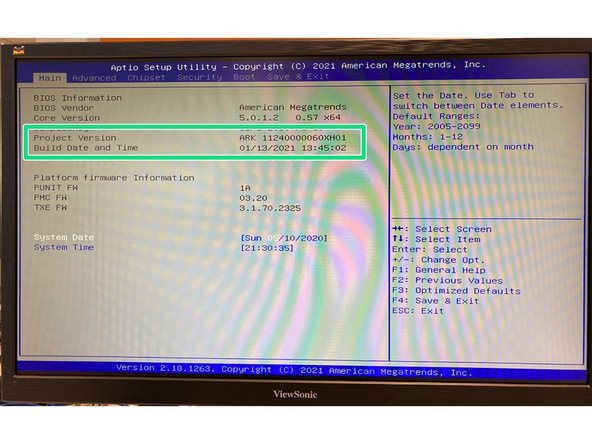
Validate the settings under the Main screen. The build date should be 01/13/2021 13:45:02
-
-
-
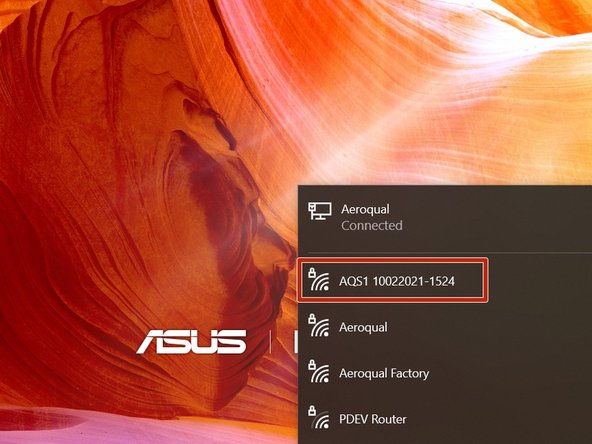
The previous serial number and data will be retained after the update. You can check this by powering up the unit and checking for it’s Wi-Fi signal, or checking to see if it appears on Cloud.
-
After Connecting to the ePC over Wi-Fi (if checking via Connect), you can verify any settings. Alternatively, you can verify settings or data by logging in to Cloud
-


For further support, contact Technical Support.
For further support, contact Technical Support.
Cancel: I did not complete this guide.
One other person completed this guide.