Introduction
When an alert is triggered, Aeroqual Cloud automatically creates an associated event. Events provide a structured record of what happened, making it easier to investigate alert conditions, confirm notifications were sent, and track the progress of an investigation over time.
-
-
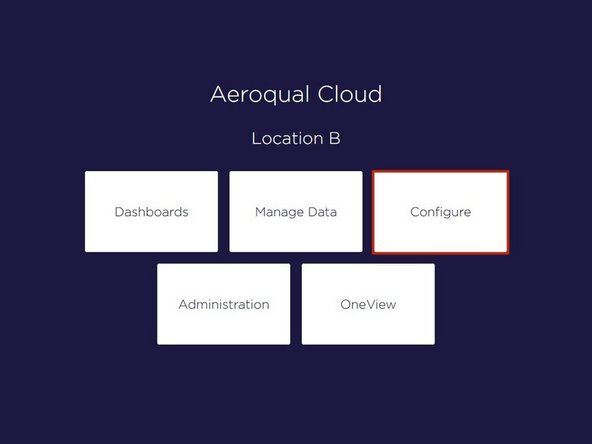
Navigate to desired instrument or monitoring location and select Configure.
-
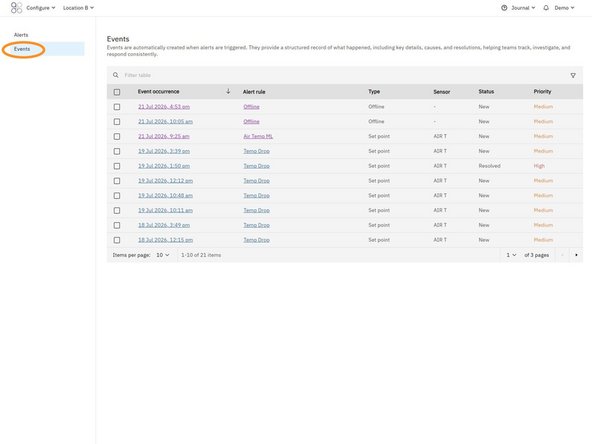
Select Events from the left navigation menu.
-
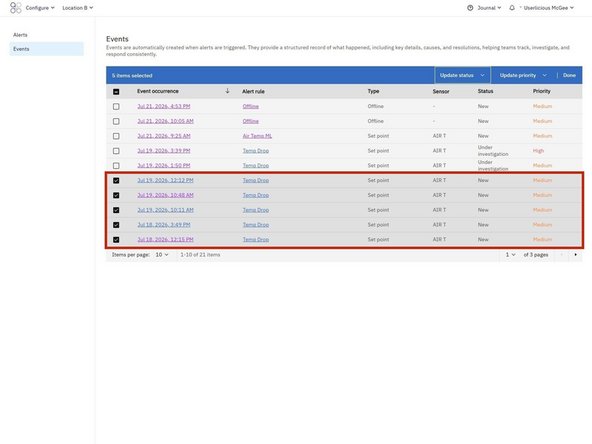
The Events page displays all events that have occurred for the selected instrument or monitoring location. Each row represents a single event.
-
Click on the event occurrence timestamp to open a specific event.
-
Select Events in the left navigation menu at any time to return to the Events table.
-
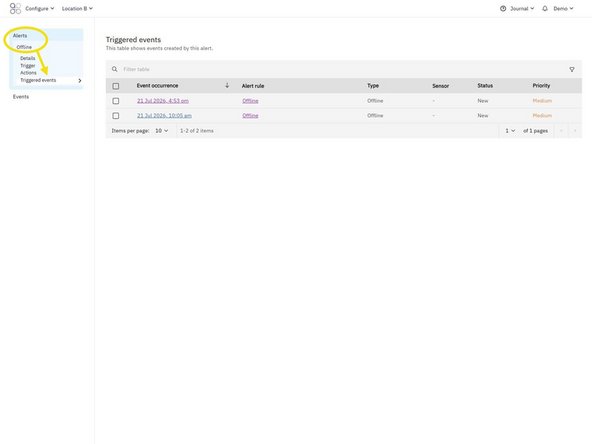
To view events generated by a single alert, you can filter the events table or open Alerts, select the required alert, then select Triggered events from the side navigation menu.
-
-
-
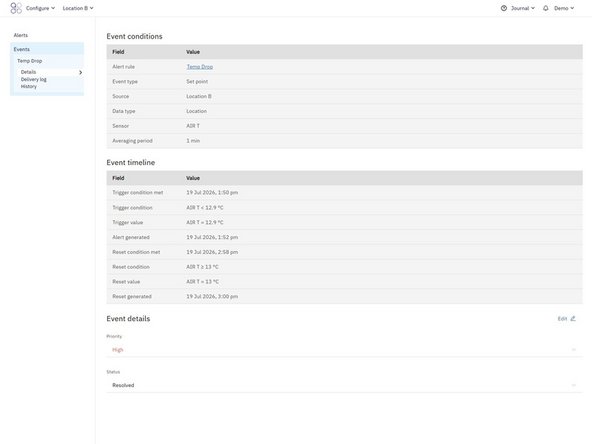
After opening an event, the Details page provides information about why the event occurred.
-
The Event Conditions section summarises the alert configuration that generated the event.
-
The Event Timeline shows information about when the event occurred and when it was resolved.
-
While an event is still active, the reset fields remain blank until the alert condition clears the reset point.
-
All dates and times are shown using the timezone configured for the selected instrument or monitoring location (project timezone).
-
-
-
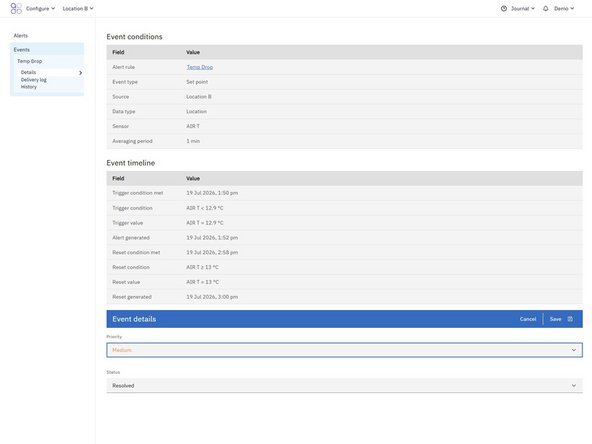
As an investigation progresses, you can update the event to reflect its current status.
-
Select Edit, then update the event as required.
-
You can change both the Status and Priority of the event.
-
When you've finished making changes, save the event.
-
-
-
Return to the Events table by selecting Events in the left navigation menu.
-
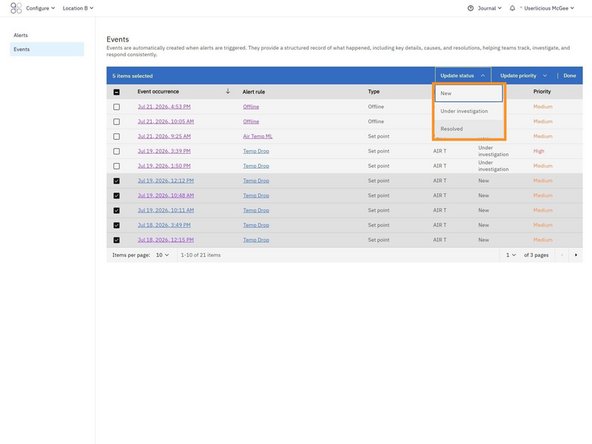
Select one or more events using the checkboxes in the first column.
-
Select Update status to change the status of all selected events.
-
Select Update priority to change the priority of all selected events.
-
Select Done to exit bulk edit mode.
-
-
-
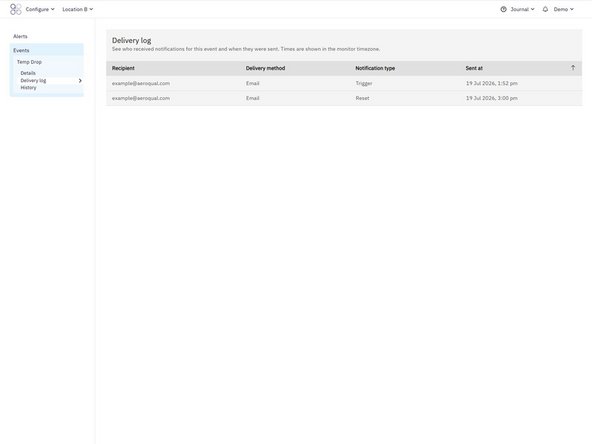
Select Delivery Log from the navigation menu.
-
The Delivery Log shows every notification that was generated for the event. This page is useful for confirming who received notifications and when they were sent.
-
The Delivery log confirms that a notification was sent from Aeroqual Cloud. It does not confirm that the message was successfully delivered, as email or SMS providers may block or filter messages.
-
Reset notifications only appear in the delivery log after the alert reset conditions have been met.
-
-
-
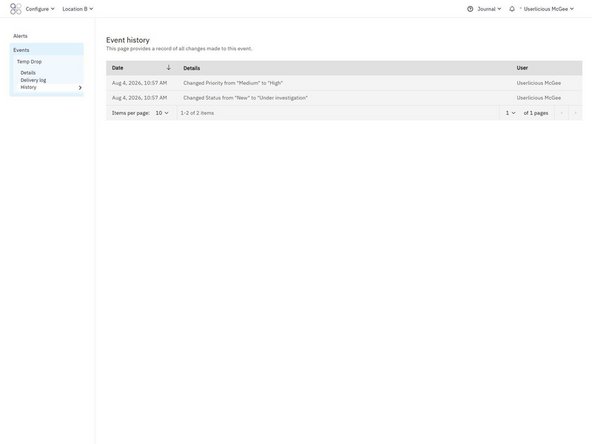
Select History from the navigation menu.
-
The Event History provides an audit trail of changes made to the event.
-
Use the Event History to review who updated the event and when.
-
For further support, contact Aeroqual Support.
For further support, contact Aeroqual Support.
