
Introduction
Offset and gain adjustments are automatically recorded by your monitor’s journal, however the software doesn’t record the fact that zero air or gas were actually delivered.
If you have an external calibrator such as the AirCal 1000, you can create a record of your calibration run – what air and gas you are going to deliver and in what sequence.
For historical reference, this is good practice because it means someone can:
- Look in the journal to see the name of a calibration run
- See what steps (points) were completed in a previous calibration run.
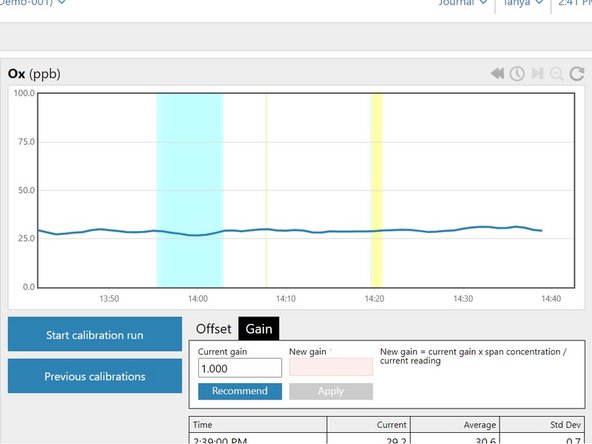
- Use the chart to see data recorded during a calibration run (zero data is highlighted green and span data is highlighted yellow).
Note: There’s no communication between an external calibrator such as the AirCal 1000 and the monitor, so the calibration run you create is the expected sequence.
-
-
From the Aeroqual Connect of Aeroqual Cloud home screen, click Calibration and Service.
-
Select Calibration from the side menu.
-
-
-
To define a calibration run, click the Start calibration run button.
-
The New calibration run dialog box appears.
-
Click Add a new calibration point.
-
Type a name for your calibration run in the Name field.
-
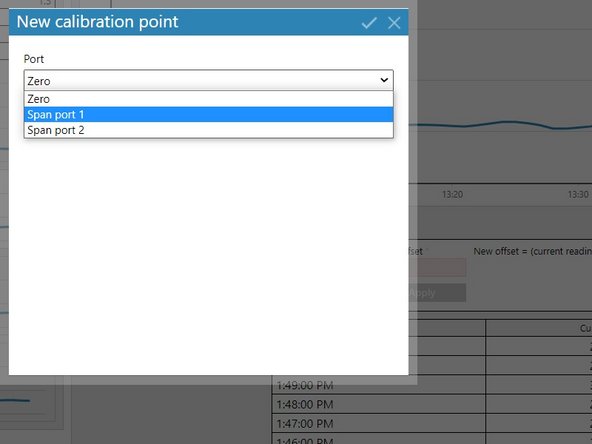
The first point in your run defaults to zero air for 10 mins. You can click that row to edit it or click Add a new calibration point.
-
-
-
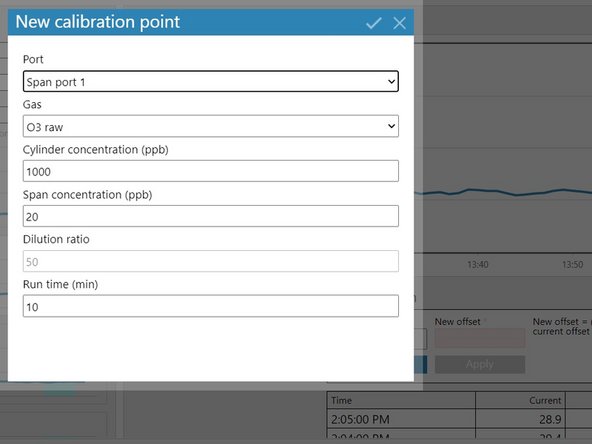
Select Span port 1 and fill in the point details.
-
Click the tick in the title bar to save.
-
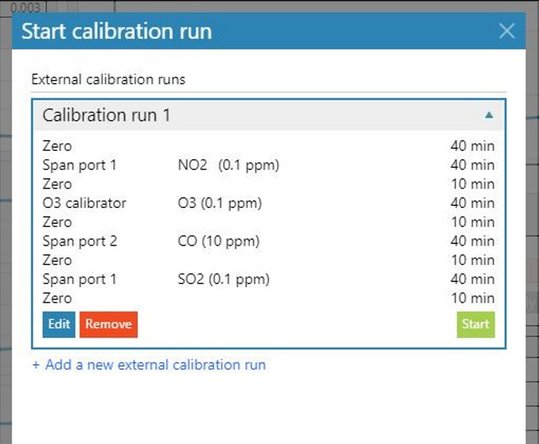
Repeat this process to create as many points in the run as needed.
-
Make sure you include a 10-minute zero air step between each span point to purge the gas lines.
-
When you're ready to start your calibration work, click Start.
-
Click OK when the confirmation message appears.
-
-
-
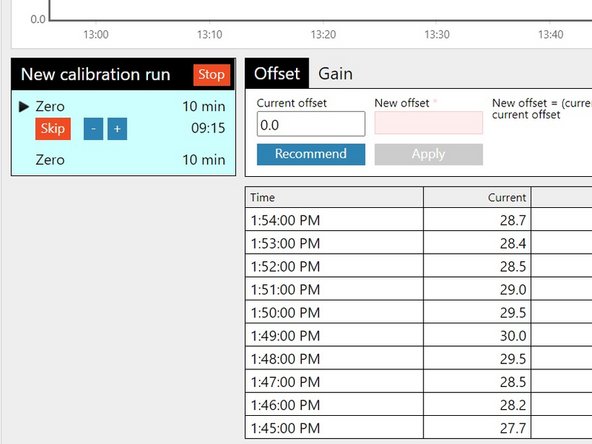
The New calibration run pane appears on the Calibration screen. It shows a timer for the active point.
-
To increase or decrease the time allocated to the active point, click the plus or minus icons.
-
For example, you might increase the time for the zero point if the gas modules are taking longer than expected to stabilize.
-
To miss a point, click Skip.
-
To stop the run at any time, click Stop.
-
-
-
To view your completed calibration run and any historical calibration runs, click the Previous calibrations button.
-
Once a calibration run is saved, you can re-run it, edit it or delete it.
-
To view data recorded during a calibration run, look for the vertical colored-stripes in your data chart (zero data is green and span data is yellow).
-


For further support, contact Technical Support.
For further support, contact Technical Support.
Cancel: I did not complete this guide.
4 other people completed this guide.
