
-
-
From the Aeroqual Connect or Aeroqual Cloud home screen, click Manage Data.
-
-
-
To manually download data for a specific period:
-
Select Download Data from the side menu.
-
Select a date range.
-
Select an averaging period.
-
Air quality data readings are taken continuously (minute or sub-minute intervals) and this averages that data over a longer period of time.
-
Check Journal and service data if you want to include that information in your file.
-
Click Download.
-
The file format is comma-separated values (.csv), which is easily opened in Microsoft Excel.
-
-
-
The Auto Export function is only available if your company has a Cloud licence and you have a user type of Engineer or higher.
-
To automatically download data on a regular basis:
-
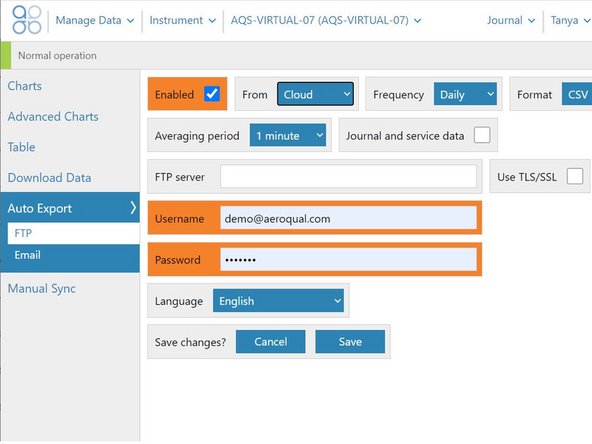
Select Auto Export from the side menu.
-
Select FTP or Email.
-
Configure your export parameters and click Save.
-
To send the data file to multiple email addresses, separate the addresses with a comma (,) or semi-colon (;). There is no limit to the number of email recipients.
-
Email recipients don't have to be users set up in Aeroqual Cloud.
-
-
-
The Manual Sync function is only available if you have a user type of Engineer or higher.
-
If the monitor doesn't have an active connection to Aeroqual Cloud but the data must be in Cloud for storage and wider access, you can download all its data via Connect and upload it to Cloud later on.
-
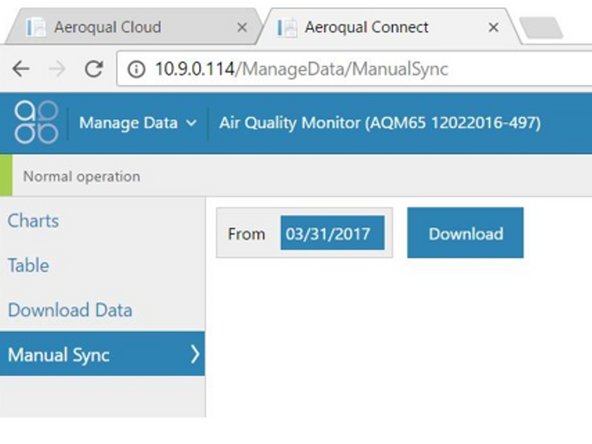
Select Manual Sync from the side menu.
-
Leave the default From date.
-
If you've never done a manual sync before, the date defaults to 01/01/1980. If you have done a manual sync before, the end date of the previous sync is the default.
-
Click Download.
-
Connect creates files containing a maximum of 1 million records. If your data exceeds this, the From date shows how far the data goes in the first file.
-
Click Download to create as many .sync files as needed to get to today’s date.
-
-
-
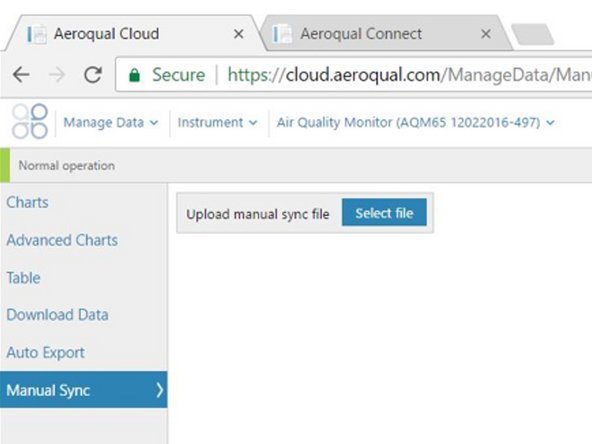
When you have a connection to Cloud, you can upload the files one by one.
-
Select Manual Sync from the side menu.
-
Click Select file and browse to your .sync file.
-
Click Upload manual sync file.
-
The Manual Sync feature downloads all data for the selected monitor, including service data and journal entries.
-


For further support, contact Technical Support.
For further support, contact Technical Support.
Cancel: I did not complete this guide.
One other person completed this guide.
