Introduction
Contributions calculate the difference between measurements collected at upwind and downwind monitoring locations, helping you assess the impact your site is having on downwind air quality.
This guide explains how to create and configure a contribution in OneView.
-
-
Open the relevant project in OneView.
-
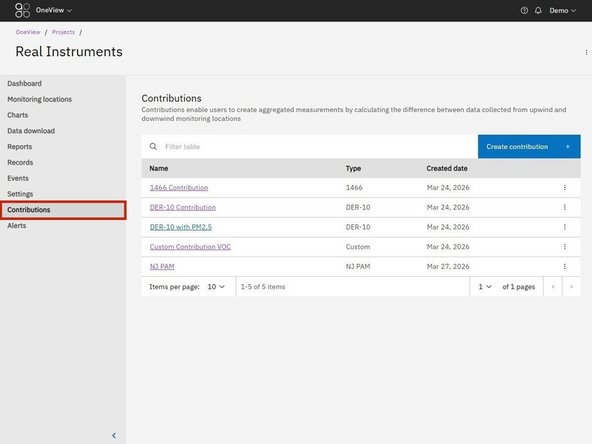
Select Contributions from the left navigation menu.
-
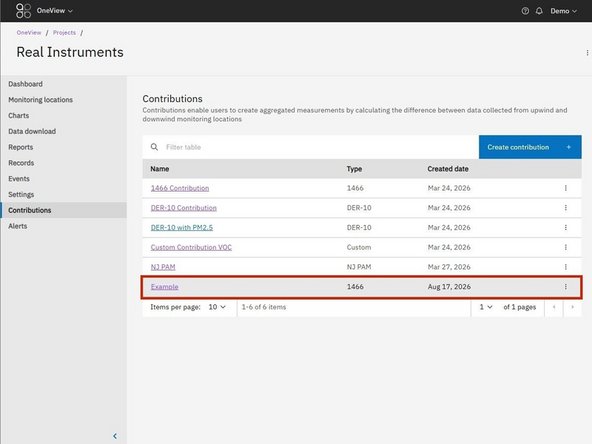
The Contributions page displays all contributions currently configured for the project.
-
-
-
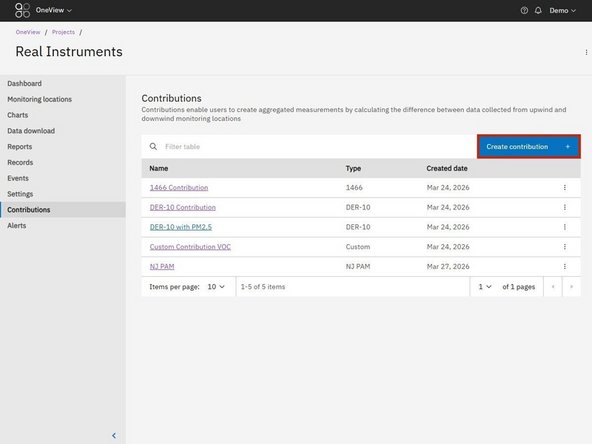
Select Create contribution.
-
The contribution setup workflow will open.
-
Follow the steps in the workflow to configure your contribution.
-
-
-
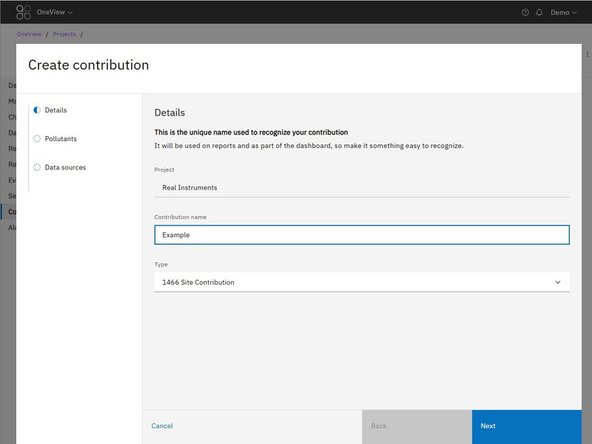
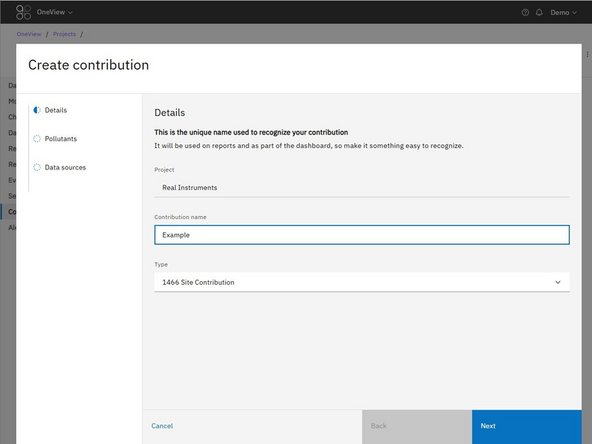
Enter a Name that will help you identify the contribution.
-
Select the appropriate Contribution type.
-
The contribution type determines the calculation and configuration options available in the following steps.
-
Select Next to continue to the pollutants step.
-
-
-
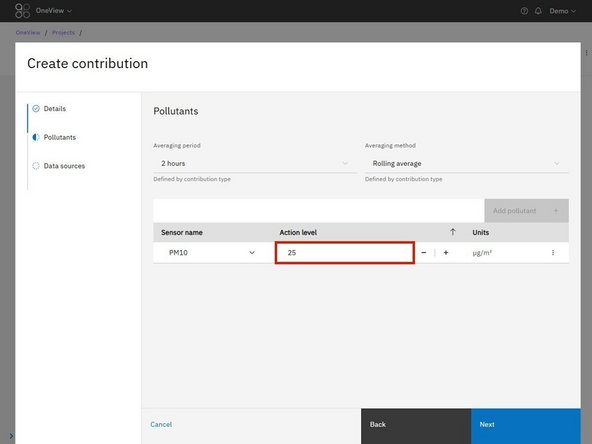
Select the averaging period and averaging method for the contribution.
-
For some contribution types the averaging period and methodology are defined by the contribution type and cannot be changed.
-
Select Add pollutant to add a new pollutant to the contribution.
-
For each pollutant enter an Action level.
-
The action level defines the regulatory threshold used to assess the contribution. It is used in reports and to determine the gauge fill displayed in the contribution widget on the dashboard.
-
Select Next to continue to the data sources step.
-
-
-
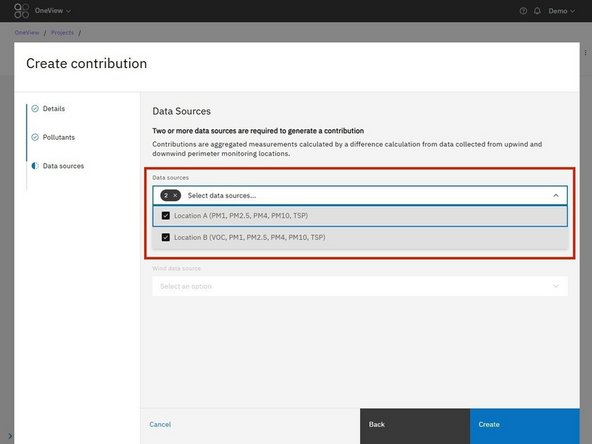
Select the monitoring locations that will provide the measurement data for the contribution. A minimum of 2 locations are required.
-
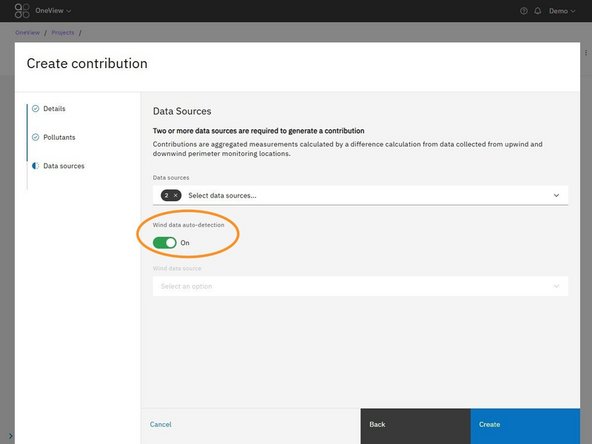
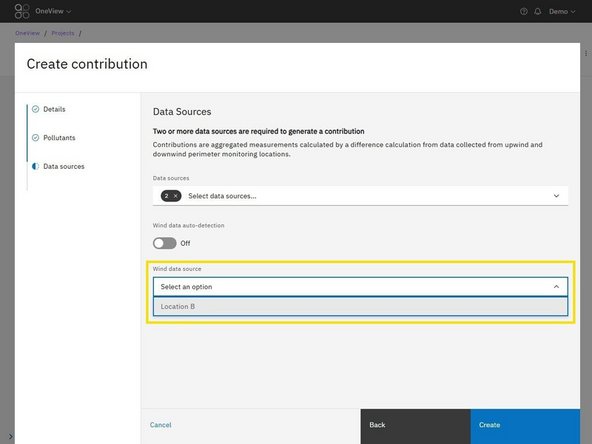
Choose how OneView should select the wind data source using Wind data auto-detection:
-
On: OneView automatically selects an available wind data source. If the wind data source being used goes offline, OneView will automatically switch to another available wind data source, if one is present.
-
Off: Select the specific Wind data source you want the contribution to use. If this source goes offline, the contribution will stop calculating, even if another wind data source is available. Calculation will resume when the selected wind data source comes back online.
-
Keeping Wind data auto-detection on can help prevent interruptions to contribution calculations when a project has multiple wind data sources.
-
Select Create to complete the setup.
-
The new contribution will appear in the Contributions table.
-
-
-
From the Contributions table, select the name of the contribution you want to view.
-
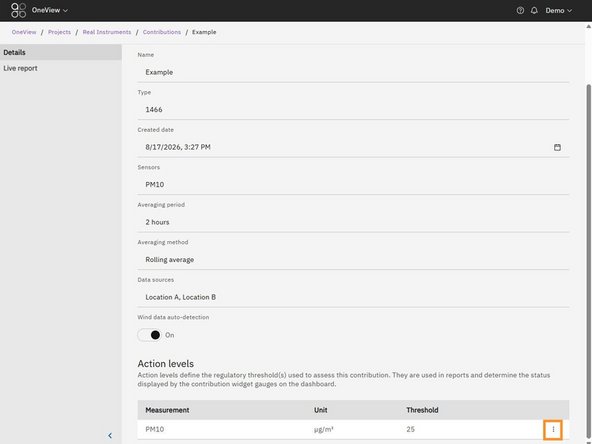
The Details page displays the contribution configuration, including its sensors, averaging settings, data sources and action levels.
-
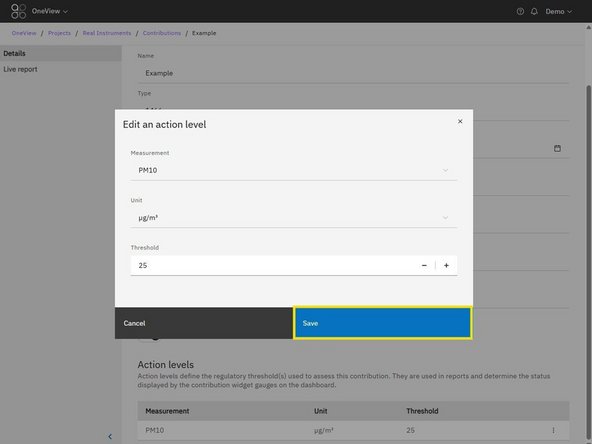
To change an action level, use the kebab menu (⋮) to select the Edit option for the relevant action level.
-
Save your changes when finished
-
For further support, contact Aeroqual Support.
For further support, contact Aeroqual Support.
