
-
-
From the Aeroqual Cloud home screen, select Administration.
-
-
-
An organization (company) sits at the top of the hierarchy.
-
Projects sit under the organization.
-
Monitoring locations sit under a project.
-
Monitors can sit under an organization or under a project. They may or may not be attached to a monitoring location.
-
A black monitor icon means the monitor is online. A grey icon means the monitor is offline.
-
Organizations with other organizations beneath them have a different icon to organizations with only projects.
-
-
-
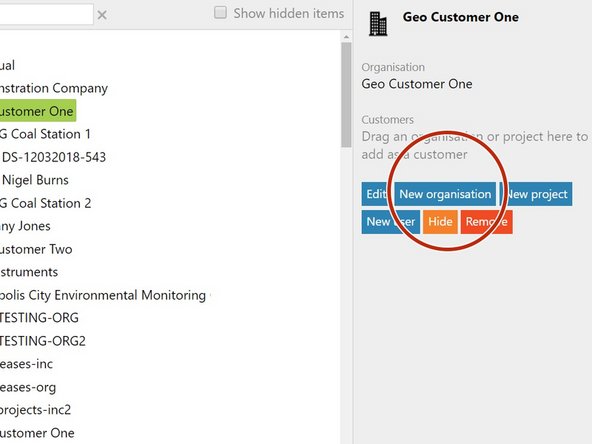
Select the organization you want the organization to sit underneath and click New organisation.
-
Enter the organization's name.
-
The name can't contain any of the following characters: ! * ' ( ) ; : @ & = + $ , / ? % # [ ]
-
Enter a location for the organisation by using the dynamic location field or by using the + and - icons to navigate the map.
-
To ensure you get an email alert when any of the organization's licenses are due to expire, enter your email address in the Main user field. Use a semi-colon ';' separator to add multiple addresses.
-
If several licenses are due to expire at the same time, you'll receive a single email for all of them.
-
Click the tick icon to save.
-
-
-
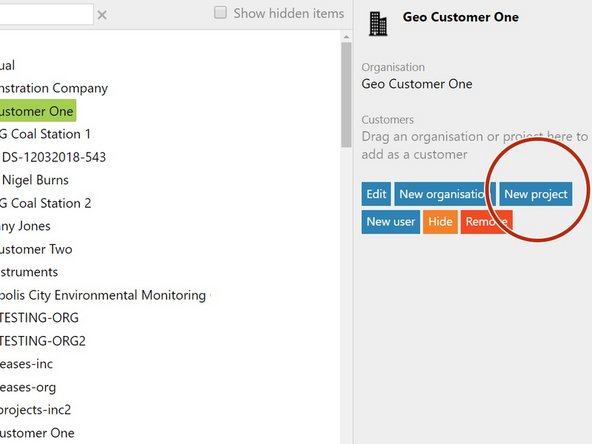
Select the organization you want the project to sit underneath and click New project.
-
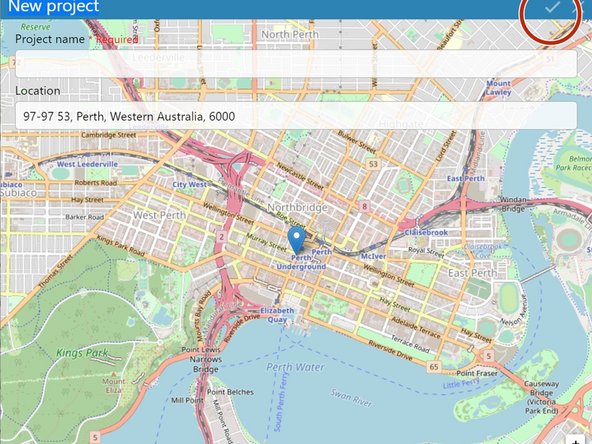
Enter a meaningful name for your project.
-
The name can't contain any of the following characters: ! * ' ( ) ; : @ & = + $ , / ? % # [ ]
-
Enter a location for the project by using the dynamic location field or by using the + and - icons to navigate the map.
-
Click the tick icon to save.
-
-
-
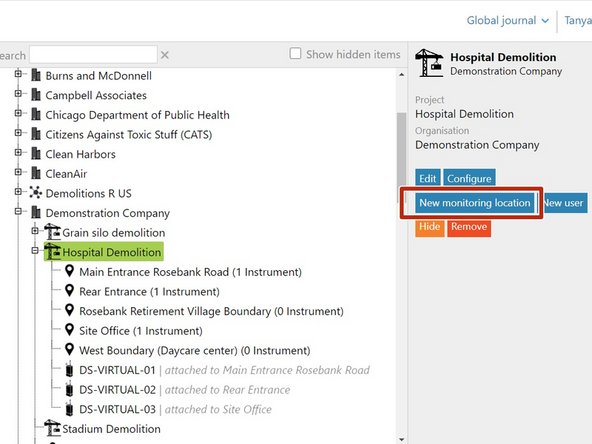
Select the project you want the monitoring location to sit underneath and click New monitoring location.
-
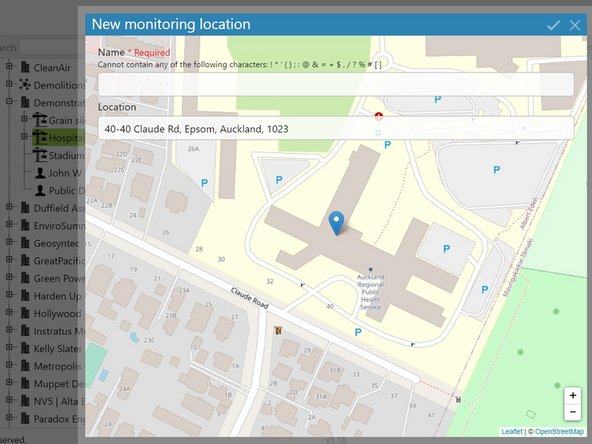
Enter a meaningful name for your monitoring location.
-
The name can't contain any of the following characters: ! * ' ( ) ; : @ & = + $ , / ? % # [ ]
-
Zoom in on the map using the plus icon and click the exact spot for your monitoring location.
-
Click the tick icon to save.
-
You don't need to have a monitor at the monitoring location to create the location in Aeroqual Cloud.
-
-
-
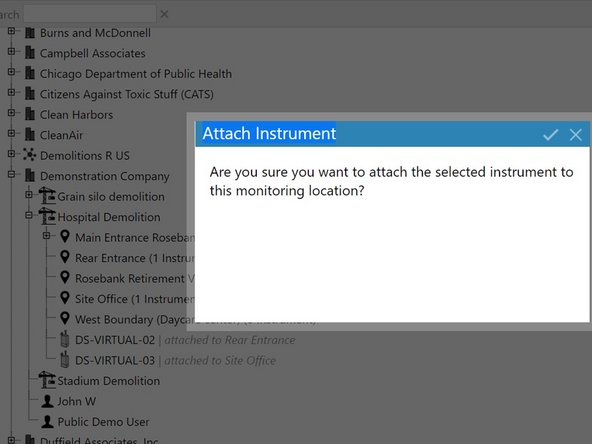
To attach a monitor to a monitoring location, click and drag it in the main window.
-
Click the tick icon to save.
-
The words: attached to <monitoring location> appear in grey italicized text next to the monitor.
-
-
-
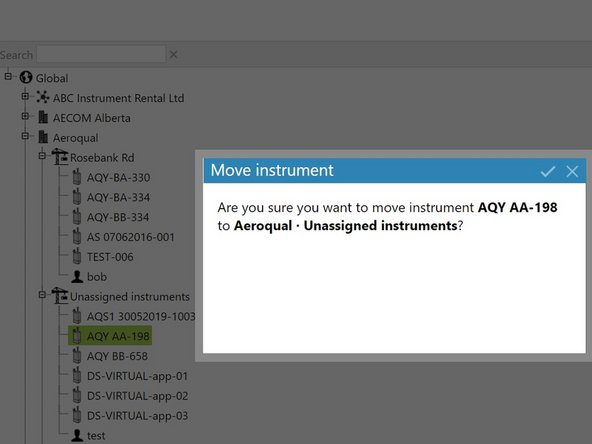
To move a monitor to another organizational level or project, click and drag it in the main window.
-
If the monitor is attached to a monitoring location, you first need to 'detach' it. To do this:
-
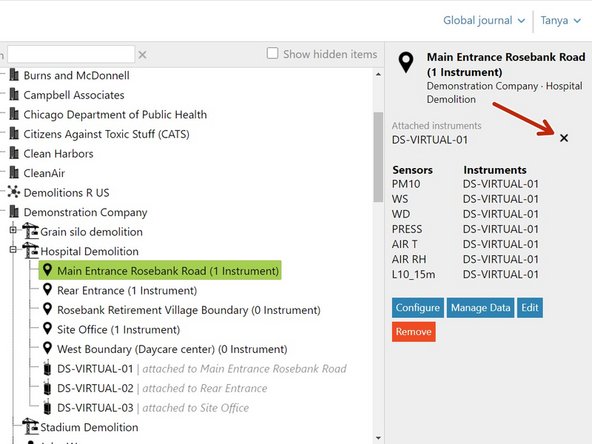
Select the monitoring location it's attached to in the hierarchy.
-
Click the x beside the monitor you want to detach in the details pane.
-
Data collected at the monitoring location is permanently stored and you can view and download it after the monitor is gone.
-
-
-
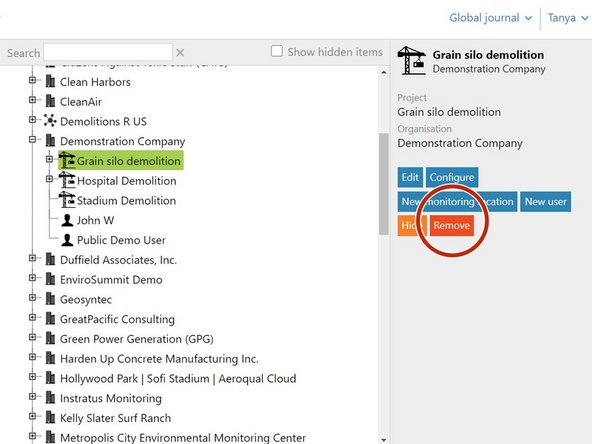
To delete an organization, project or monitoring location, simply select it in the hierarchy and click Remove.
-
-
-
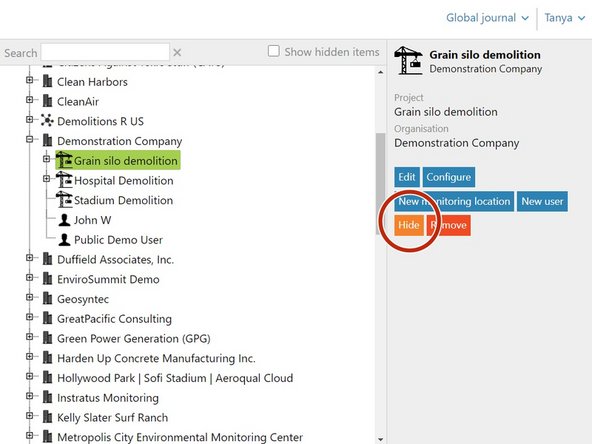
Some times you might want to hide an item from view, for example, a project that's been completed or a monitor that's been leased and returned.
-
To hide an item, simply select it in the hierarchy and click Hide. Click the tick icon to save.
-
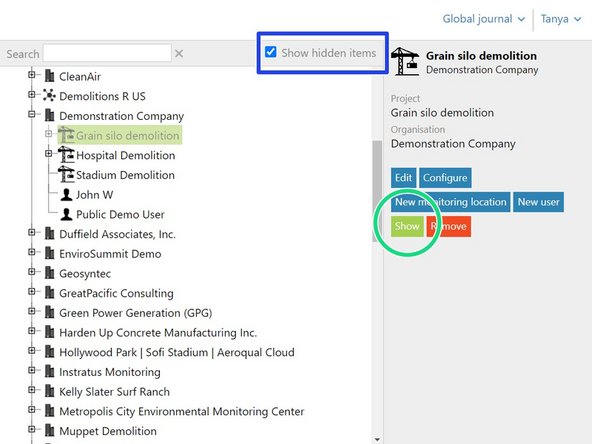
To see what items are in the hidden state, click Show hidden items. Hidden items appear in light grey type.
-
To make a hidden item permanently visible again, select it and click Show.
-


For further support, contact Technical Support.
For further support, contact Technical Support.
Cancel: I did not complete this guide.
2 other people completed this guide.
