
Introduction
The site contribution tool allows building or demolition or earth works projects to calculate the concentration of pollutant they are contributing to their boundary.
The procedure involves measuring an upwind concentration (pollutant coming on to a site from outside) and measuring a downwind concentration (pollutant leaving a site at the boundary).
The difference: Downwind - Upwind concentration is called the site contribution, and it is this calculated concentration which needs to be kept below a threshold.
The site contribution tool makes this easy by assessing the upwind and downwind site locations every minute in real time and performing the contribution calculation each minute. If specific averaging is required such as a 2hr rolling average then this is applied.
A SMS or email alert can be sent if the calculated concentration approaches or exceeds a predefined setpoint.
-
-
If you haven't set up monitoring locations, then follow this guide.
-
You must have monitoring locations in order to use the site contribution tool.
-
One of the monitoring locations must have a wind speed and direction sensor attached.
-
-
-
Select your project you wish to apply the contribution to. Make sure you have monitoring locations set up and you have monitors attached to the locations.
-
Check to make sure the location of the project and the time zone of the project are correct.
-
-
-
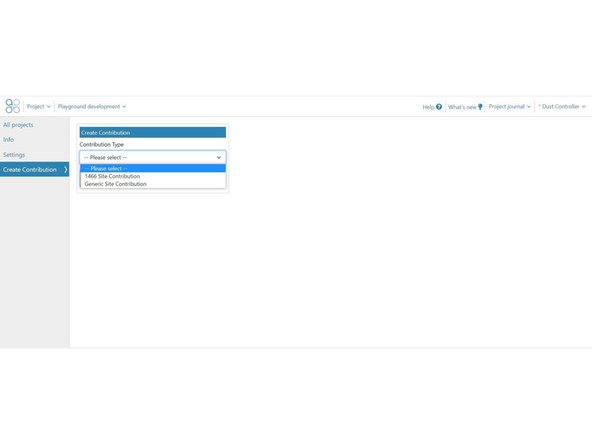
Chose the type of contribution you wish to set up:
-
Some pre-configured site contribution rules can be selected.
-
Generic allows you to select the target analyte and the averaging period. 1466 is pre-configured.
-
There can only be one target analyte per contribution.
-
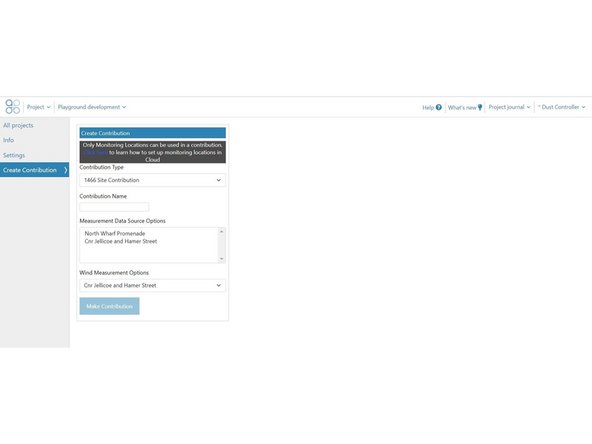
Give your contribution a name
-
Select which monitoring locations are to be included in the contribution. If not monitoring location exist which have the target analyte then the list will be blank.
-
Select which monitor will contribute the wind speed and direction data
-
Select Make Contribution
-
-
-
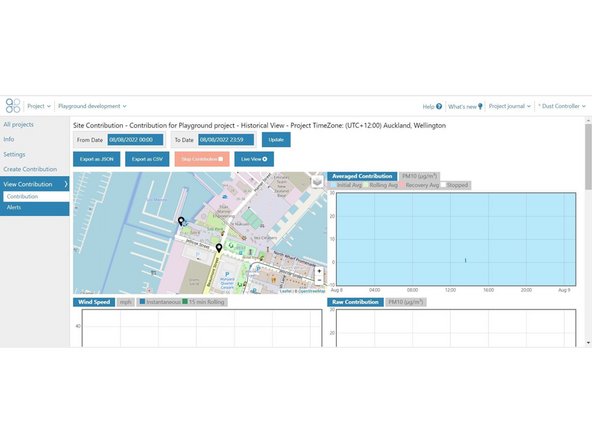
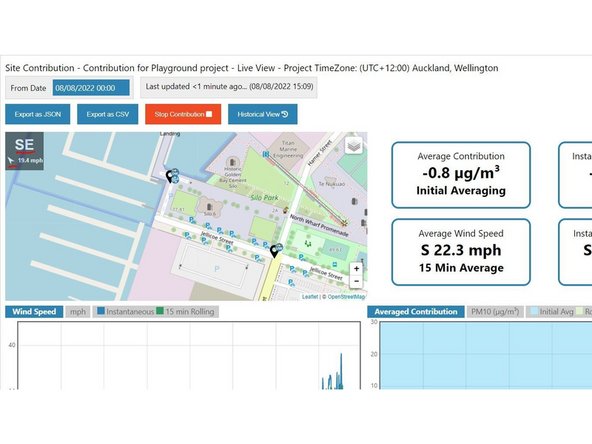
The Contribution workspace contains control elements at the top
-
When the Contribution is first created it will be "Started" this means that that the chosen rolling averaging will be calculated and that any configured Alerts will be sent: eg SMS or Email alerts.
-
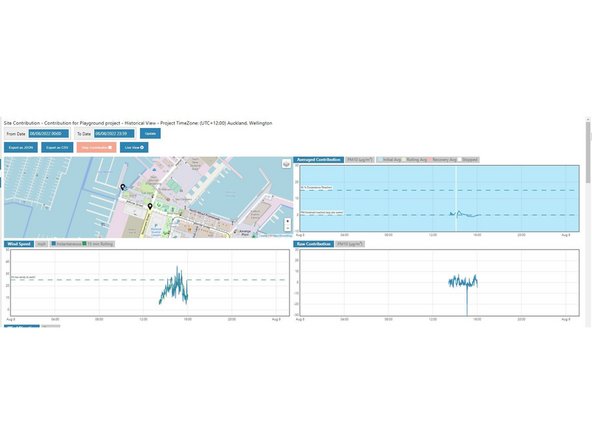
You can stop the contribution by clicking "Live View" then click "Stop Contribution button" When the contribution is stopped, only the instantaneous contribution is shown
-
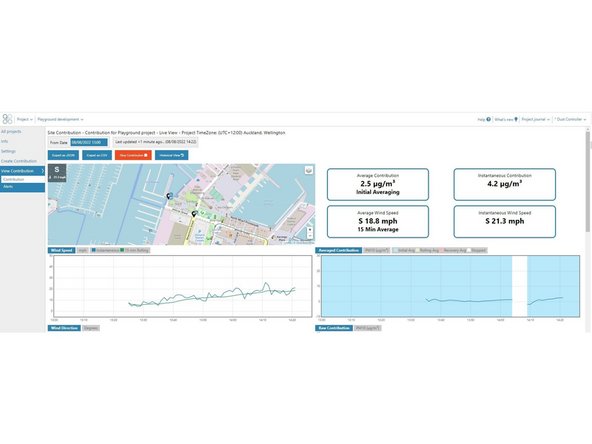
You can set the From Date and then click "Live View" to see minute by minute updates.
-
The wind indicator displays the ORIGIN of the wind in Cardinal degrees but the arrows is pointing in the direction the wind is travelling, ie the destination. In the example shown the wind is coming from the South East and heading North West at 19.4 mph
-
-
-
SMS or email alerts can be configured by clicking on the alerts button on the left hand menu.
-
An can be given a name to make it easier to understand
-
The channel needs to be selected: eg PM10 or VOC, then the averaging period then the trigger point an the reset point.
-
Alerts always come in pairs: the trigger alert and the reset alert.
-
Then multiple email recipients can be define and / or multiple SMS recipients can be defined.
-
If you have a maximum exceedance which you don't want to reach then you can set Alerts at 25 % or 50 % or 80 % of the exceedance to ensure you can act before the 100 % exceedance is reached,
-
The contribution must be started for the Alert to trigger, if the Contribution is stopped then no alerts will be sent
-
Any configured alerts will appear as annotations on the relevant charts
-
-
-
The site contribution tool follows the steps outlined by South Coast Air Quality Monitoring District.
-


For further support, contact Aeroqual Support.
For further support, contact Aeroqual Support.
Cancel: I did not complete this guide.
3 other people completed this guide.