-
-
Press the POWER button to power on the instrument.
-
An LED will illuminate on the front of the display.
-
Please wait 15 seconds for the start-up sequence to complete.
-
From the splash screen, press ANY BUTTON to proceed.
-
-
-
Press and hold the POWER button for five (5) seconds.
-
Please wait for the shut-down screen to appear.
-
The instrument will now power off.
-
In the event the instrument experiences an irrecoverable failure, a hard reset can be performed by holding the POWER BUTTON and DOWN ARROW simultaneously for 20 seconds.
-
-
-
Upon startup, the main data display page will be shown.
-
The main screen contains real-time measurement data coming from the sensor head connected to the instrument. On the top, it displays time, recording status, Wi-Fi connection status, and battery/charging status. On the bottom, it displays Location ID and date.
-
Press the LEFT and RIGHT ARROWS to navigate between Summary, Detail, and AQI display screens.
-
The AQI screen is available only while using the PMX sensor head.
-
-
-
If the sensor head is able to measure more than one parameter, then a Detail screen is available for each parameter.
-
Scroll through each parameter's Detail screen by using the LEFT and RIGHT arrows.
-
An Air Quality Index (AQI) will be visible if the AQI feature is turned On
-
Scroll through the AQI screens by using the LEFT and RIGHT arrows.
-
The AQI screen is only available while using the PMX sensor head.
-
-
-
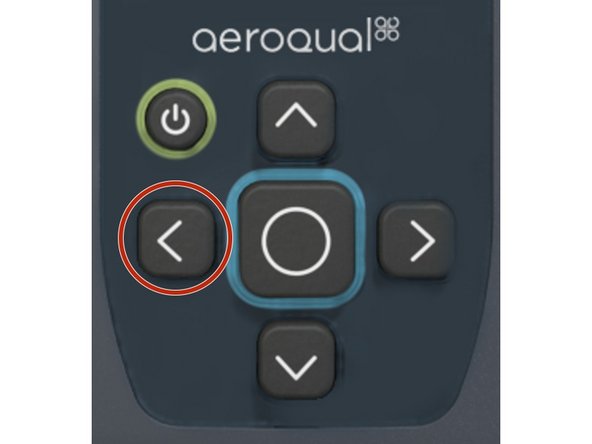
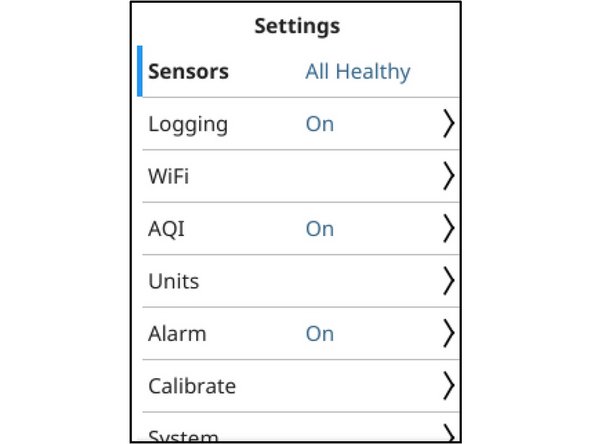
To enter the settings menu, press and hold the LEFT ARROW.
-
To exit the settings menu, press and hold the LEFT ARROW
-
For more details, visit the Settings guide
-
-
-
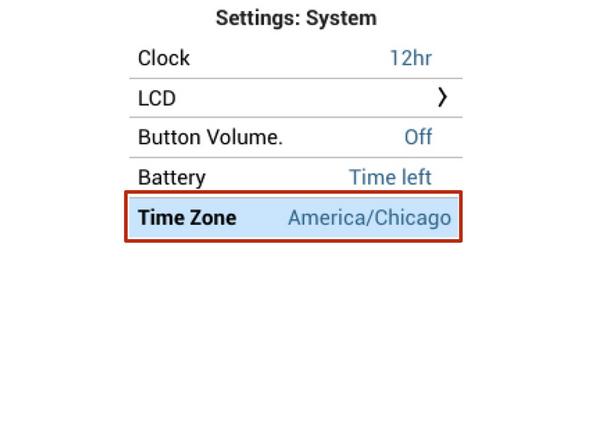
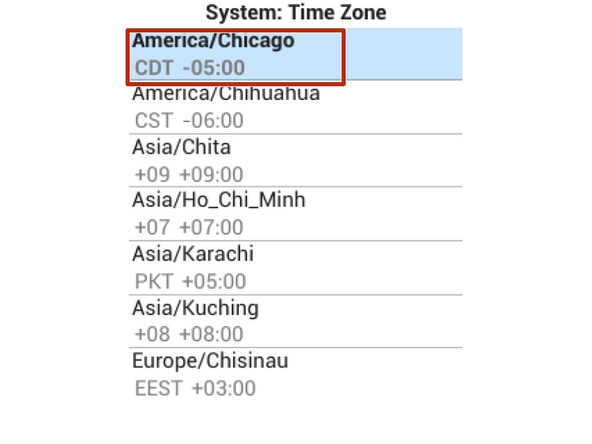
Navigate to Settings > System
-
Select Time Zone
-
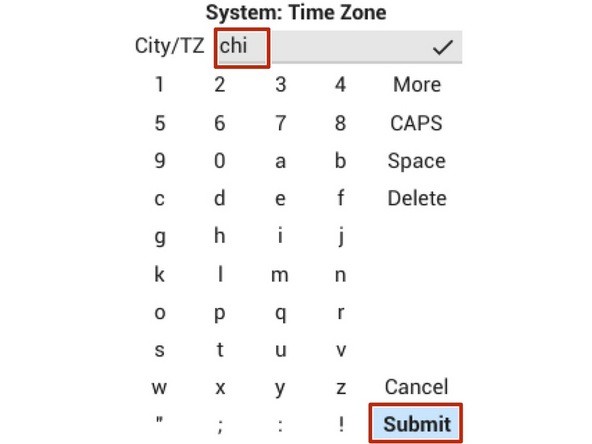
Enter the name of a large city in your preferred time zone, and select Submit
-
A list will appear. Select your city from the list.
-
Your time zone has now been set
-
-
-
-
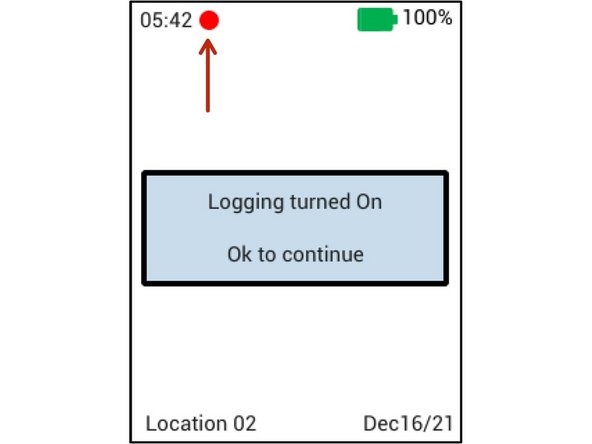
To start and stop Logging from the Main Screen, press and hold the CENTER BUTTON.
-
As long as logging is enabled, a red circle will appear at the top of the Main screen.
-
For more details and more options, please visit the Settings guide
-
-
-
Logged data is accessible through Ranger Cloud, which requires Wi-Fi, or via a USB Cable.
-
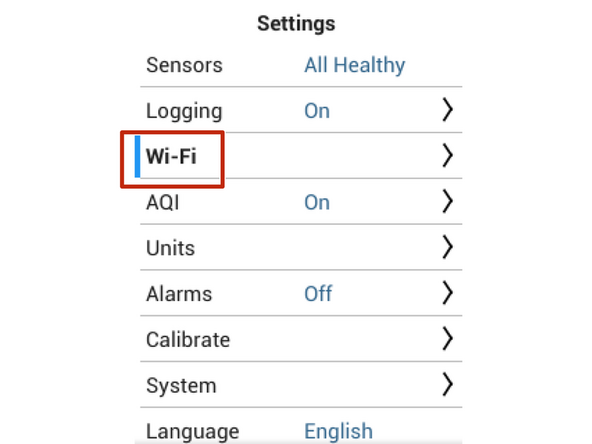
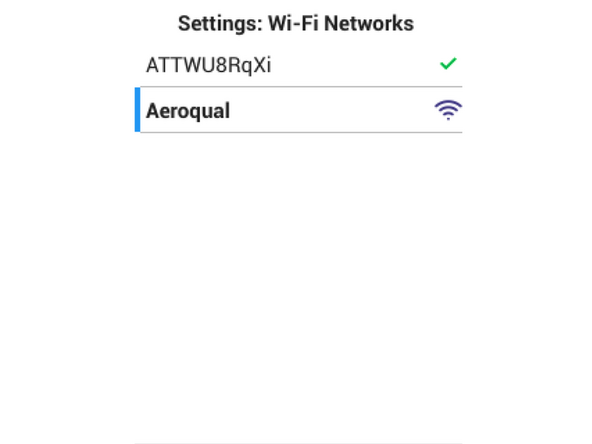
From the Settings menu, navigate to the Wi-Fi > Networks submenu.
-
Select the Wi-Fi network you want to connect to
-
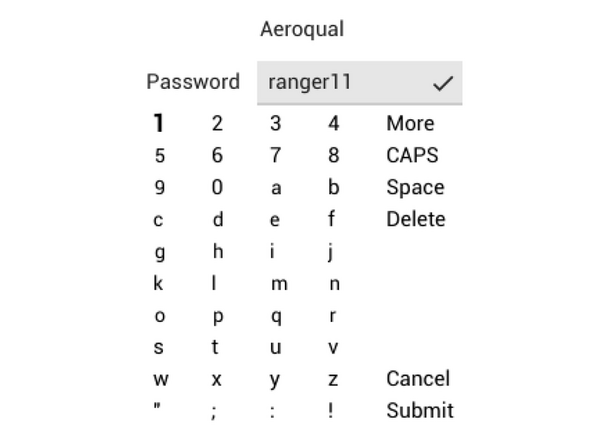
Enter the Wi-Fi network's password
-
Select Submit
-
The password is case sensitive.
-
-
-
Data logged on Ranger is accessible from Ranger Cloud, or by download with a USB Cable.
-
As long as Wi-Fi is enabled on the instrument, all logged data is immediately synchronized to Cloud.
-
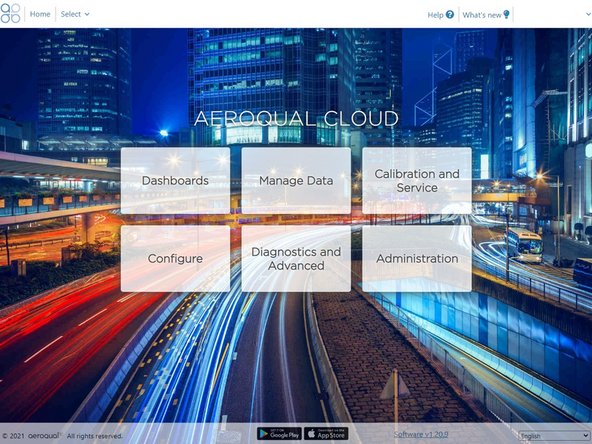
Log into Cloud
-
If you have trouble accessing your login, contact support@aeroqual.com
-
Click on "Manage Data" to access your data.
-
For further support, contact Aeroqual Support.
For further support, contact Aeroqual Support.
Cancel: I did not complete this guide.
15 other people completed this guide.


