
Introduction
This guide provides details on how to remove and reinstall a PCX module and it's corresponding temperature and humidity (T/RH) sensor from an DS or AQS1.
-
-
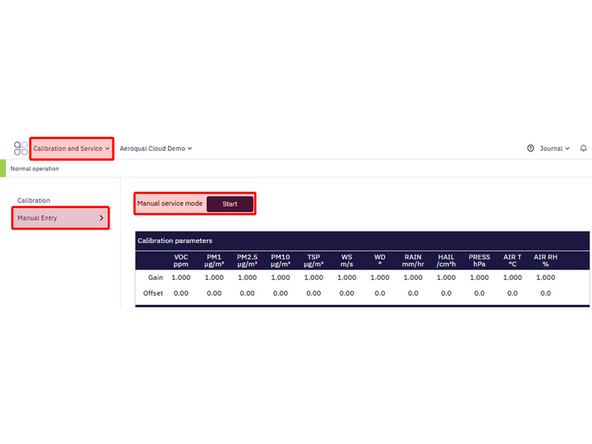
From Aeroqual Cloud or Connect navigate to the Calibration and Service Page for your instrument, and click on the Manual Entry tab.
-
Click on the Start button next to Manual service mode to enter Service Mode. This will ensure that any fluctuations in the data caused from this activity can be excluded from air quality reports.
-
-
-
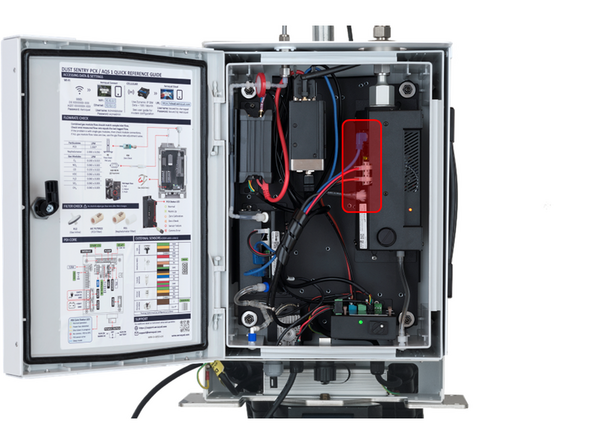
Disconnect the power and data cables, along with the temperature and humidity sensor cable plugged into the front of the module.
-
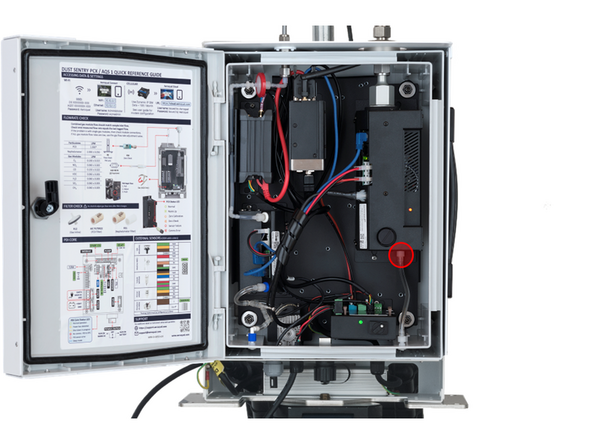
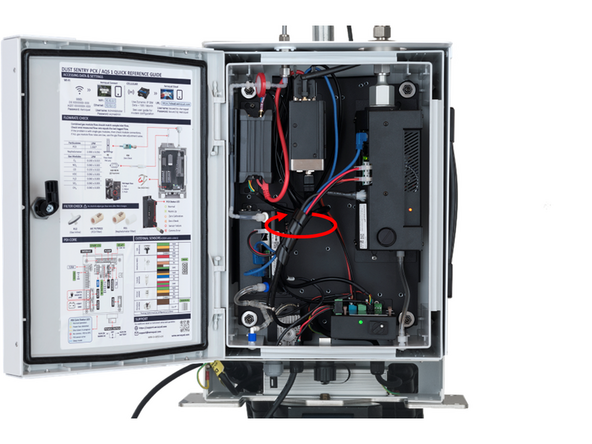
Disconnect the tubing from the fitting on the bottom of the PCX module by rotating the Luer fitting counterclockwise.
-
-
-
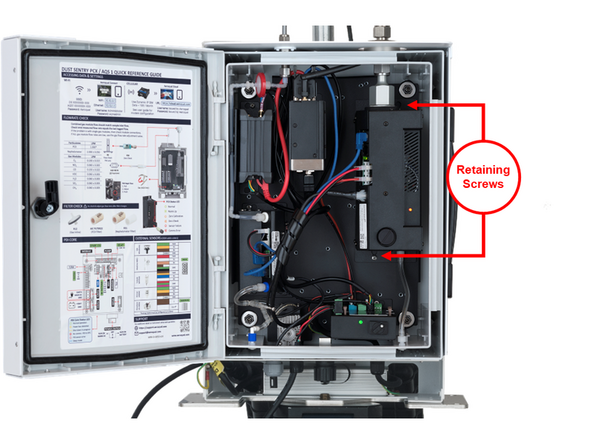
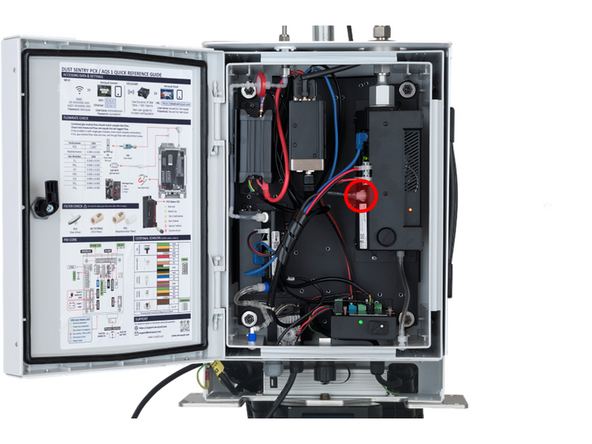
Loosen the two screws at the locations shown, which will allow the module to slide down.
-
Note that the screws do not need to be removed completely in order to remove the module
-
-
-
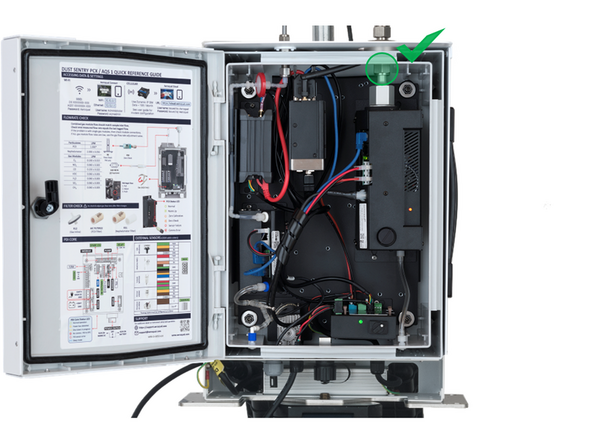
Loosen the Swagelok fitting at the top of the module – this may require a wrench (7/8”). The Swagelok nut should drop down on the inlet when fully removed.
-
If the ferrule remains stuck in the fitting, wiggling the module should dislodge it.
-
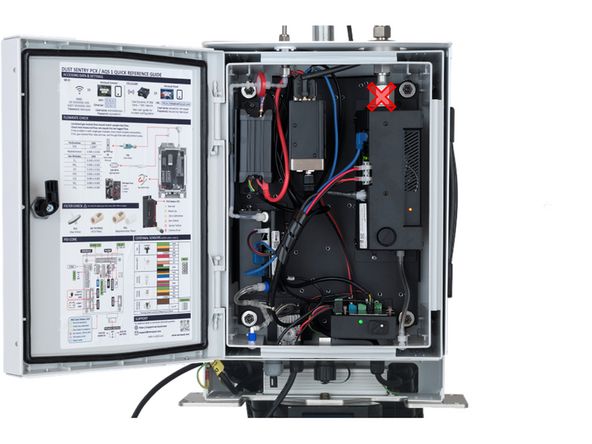
Do not disconnect the module by unscrewing the larger hex assembly.
-
-
-
After the Swagelok fitting has been disconnected the module should slide down and disconnect from the backplate via the keyhole slots
-
-
-
The temperature and relative humidity sensor (T/RH) plugs into the PCX module and should have been unplugged in a previous step. If not, unplug it now.
-
Remove the sensor cable from and cable wraps to allow it to be removed
-
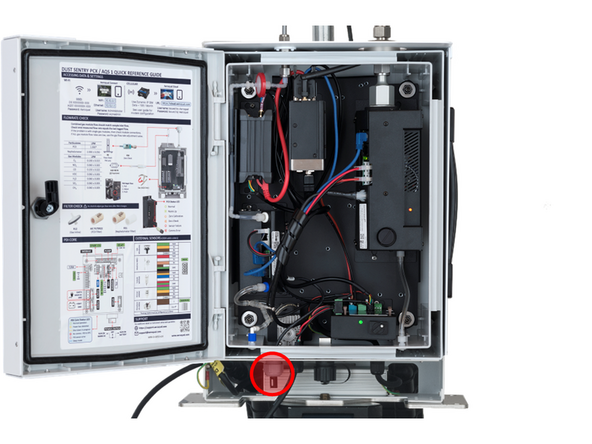
Loosen the cable gland on the bottom of the instrument by turning the outer portion of the gland counter clockwise
-
Push the sensor up and into the instrument. You should now be able to remove the T/RH sensor assembly.
-
-
-
To re-install a PCX module, repeat the above steps in the opposite order.
-
Slot the PCX module onto the mounting screws and slide up until the Swagelok fitting engages
-
Tighten the Swagelok fitting
-
Tighten the retaining screws
-
Reconnect power and data cables, along with the exhaust tubing
-
-
-
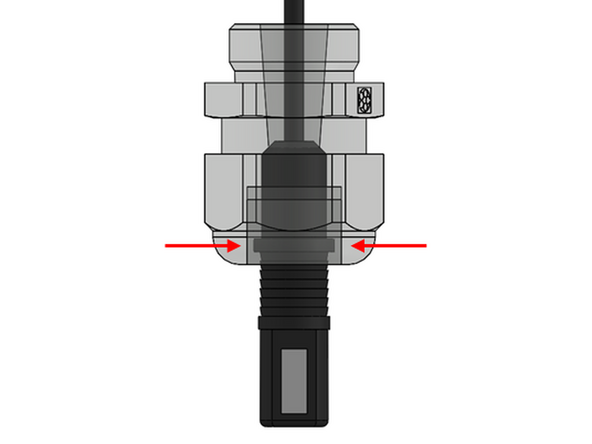
To reinstall the T/RH sensor, insert the sensor back into the large cable gland such that the collar on the sensor sits within the grommet of the cable gland.
-
Tighten the cable gland, securing the sensor's position.
-
Re-secure the sensor cable in place using the cable wrap.
-
Plug the sensor back into the PCX module.
-

For further support, contact Aeroqual Support.
For further support, contact Aeroqual Support.
Team
