
-
-
Disconnect the power supply at the bottom of the AQY 1 unit.
-
Remove the front cover by loosening all 4 screws (they won't come out of the casing).
-
Unscrew the modem/USB mounting bracket.
-
Disconnect the USB connections and remove the entire bracket with USB backup and modem attached.
-
-
-
Pull down the raspberry Pi at the top right of the enclosure to separate it from the white connectors. This gives you access to the SD card.
-
Fit the new SD card.
-
Push the raspberry Pi back up and re-connect the modem/USB backup bracket.
-
-
-
Aeroqual Cloud shows serial numbers for both the old and new SD cards.
-
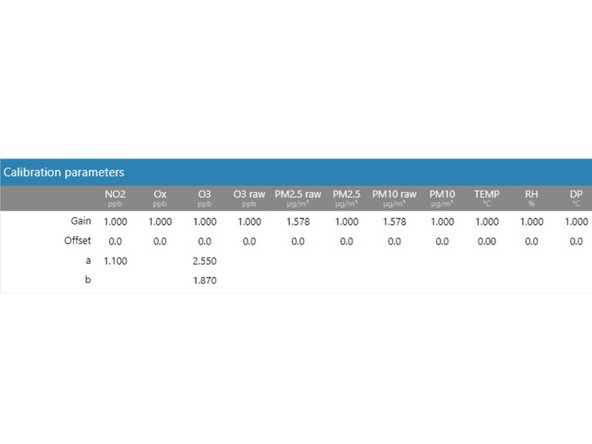
Navigate to the Manual Entry area of the Calibration and Service app for the original serial number and record the calibration parameters.
-
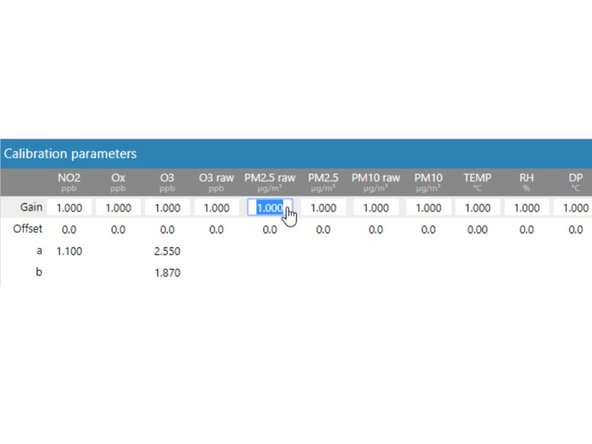
Navigate to the Manual Entry area of the Calibration and Service app for the new serial number and enter the parameters you recorded.
-
If your replacement SD card has the serial number “SPARE”, log in to Aeroqual Cloud and contact Aeroqual.
-


For further support, contact Technical Support.
For further support, contact Technical Support.
Cancel: I did not complete this guide.
2 other people completed this guide.

Team
