
-
-
To enter the settings menu, press and hold the LEFT ARROW.
-
To exit the Settings menu and return to the main data display, press and hold the LEFT ARROW
-
-
-
To enter a sub-menu
-
navigate to it by using the UP and DOWN ARROWS
-
then press the CENTER button.
-
To edit any field
-
press and hold the CENTER button until it becomes highlighted
-
Then, change the field's value by using the UP and DOWN ARROWS.
-
Then, press CENTER again
-
-
-
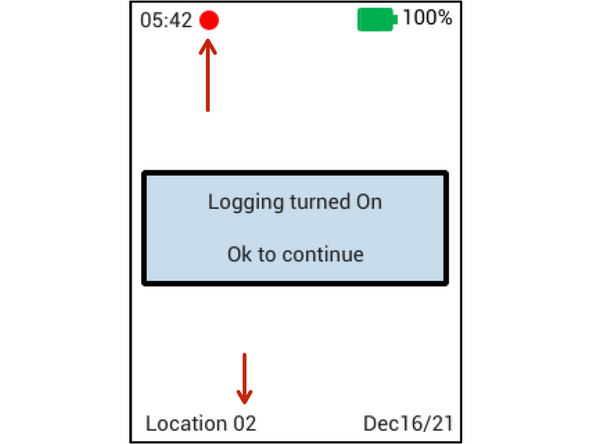
To start and stop Logging from the Main Screen, press and hold the CENTER BUTTON.
-
When logging is enabled, a red circle will appear at the top of the Main display
-
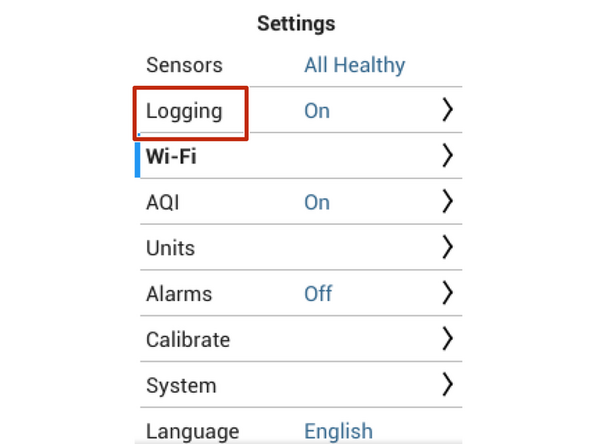
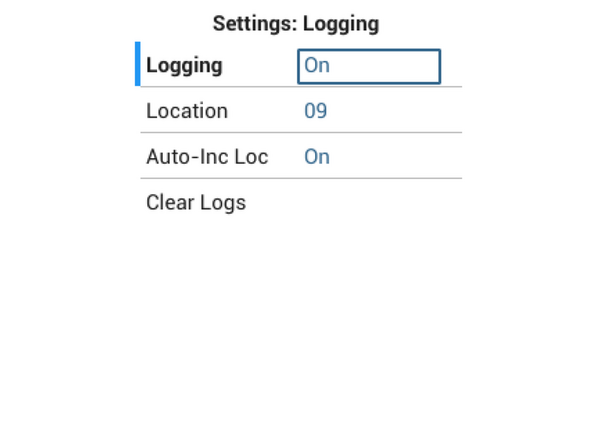
To start and stop Logging from the Settings menu, navigate to Settings>Logging, then toggle Logging to "On" or "Off"
-
To change the location tagged with the logged data, navigate to Settings>Logging and toggle the Location
-
This Location identifier is displayed at the bottom of the data display screen.
-
Logged data is stored locally on the device and is synchronized to Aeroqual Cloud when the device is connected to the internet.
-
-
-
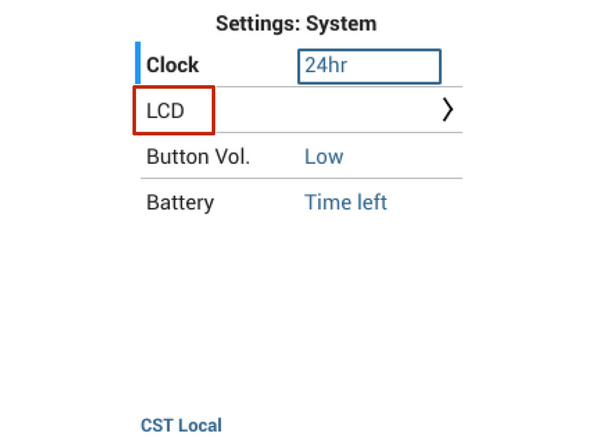
To adjust the brightness of the display, enter the Settings menu
-
Navigate to Settings > LCD
-
Edit the LCD brightness value
-
-
-
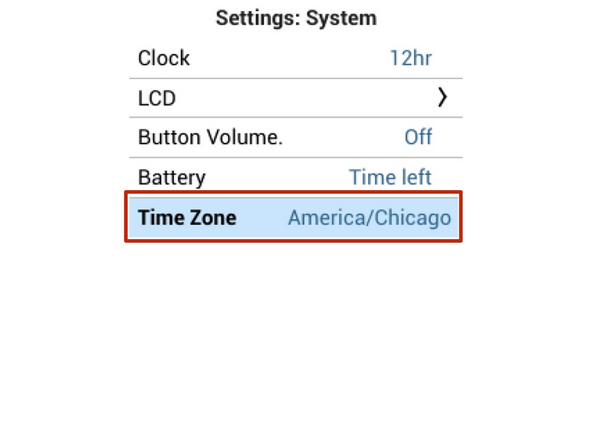
Navigate to Settings > System
-
Select Time Zone
-
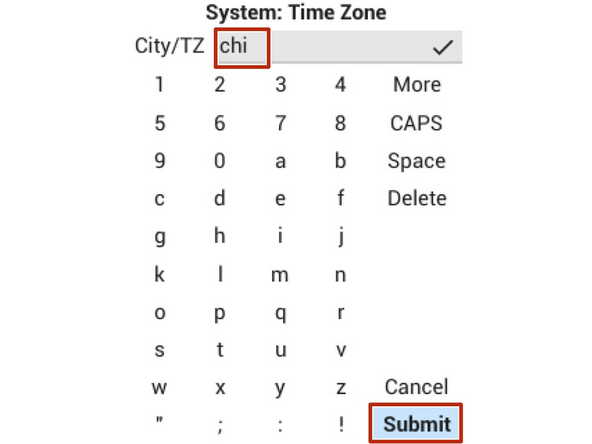
Enter the name of a large city in your preferred time zone, and select Submit
-
A list will appear. Select your city from the list.
-
Your time zone has now been set
-
-
-
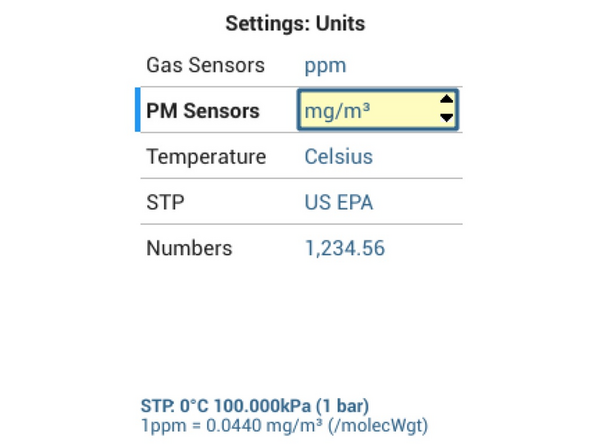
To edit the units of measure displayed in the readings, enter the Settings menu
-
Navigate to Settings > Units
-
Adjust the units for instant readings on the various displays
-
Even if you adjust the instant reading units, the default units (ppm for gases, µg/m3 for PM) will continue to be used when logging and synchronizing through Wi-Fi
-
-
-
Enter the Settings menu
-
Navigate to Settings > Alarm
-
Set the desired channel
-
Set the desired Trigger and Warning Levels
-
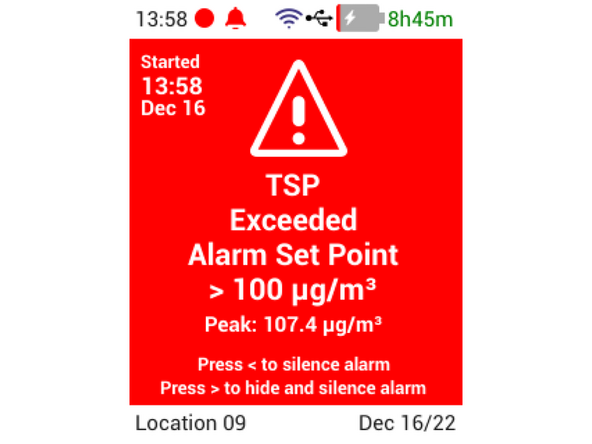
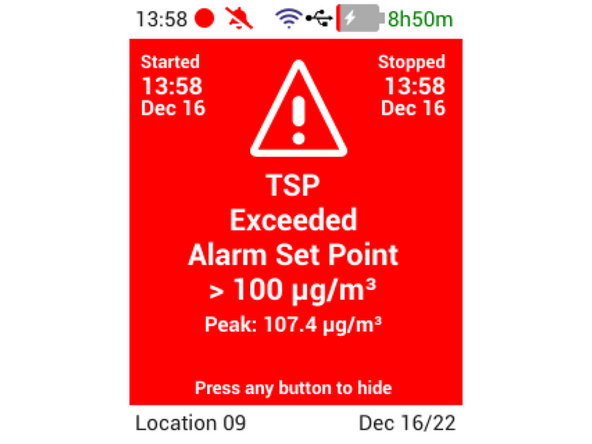
When real-time measurements exceed the Warning Level or Trigger Level, the instrument will sound an audible alarm and display a message
-
-
-
When real-time measurements exceed the Trigger Level, the instrument will sound an audible alarm. A message will appear until it's hidden by the user
-
When real-time measurements exceed the Warning Level, the instrument will sound an audible alarm. A message will appear until the real-time measurements drop below the Warning Level
-
To hide an alarm, press the RIGHT ARROW
-
To keep the message, but silence the alarm press the LEFT ARROW
-
-
-
Note that logged data is only accessible through Ranger Cloud, which requires Wi-Fi.
-
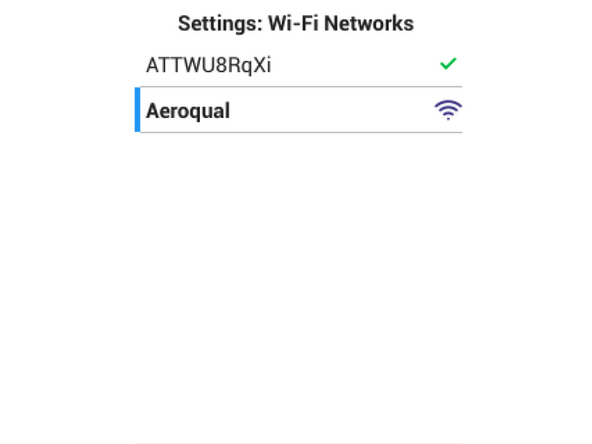
From the Settings menu, navigate to the Wi-Fi > Networks submenu.
-
Select the Wi-Fi network you want to connect to
-
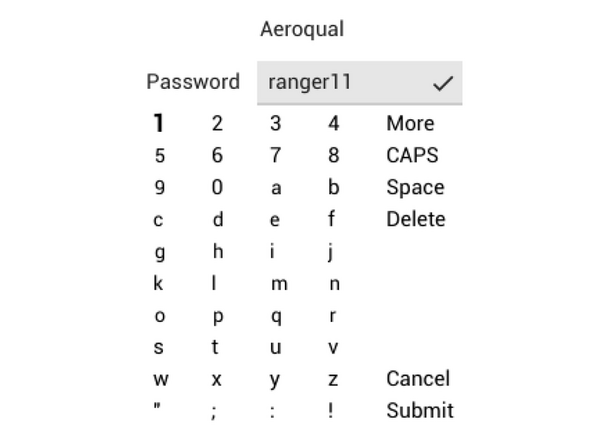
Enter the Wi-Fi network's password
-
Select Submit
-
The password is case sensitive.
-
-
-
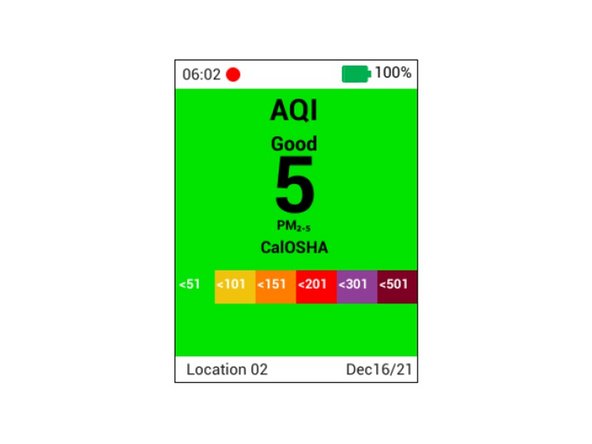
An Air Quality Index (AQI) will be visible in the Main Screen when the AQI feature is turned On
-
Navigate to Settings > AQI
-
Toggle AQI from "Off" to "On"
-
The AQI screen is only available while using the PMX sensor head.
-
-
-
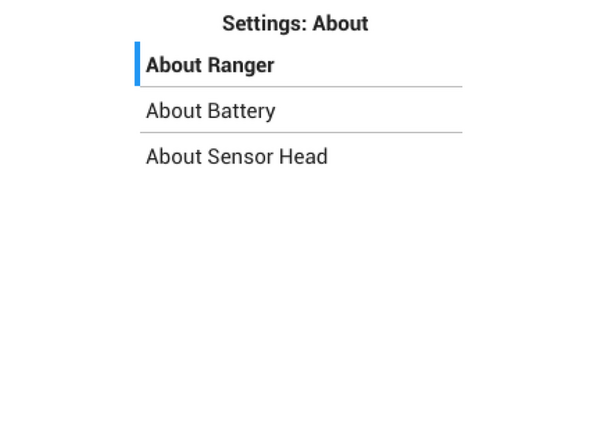
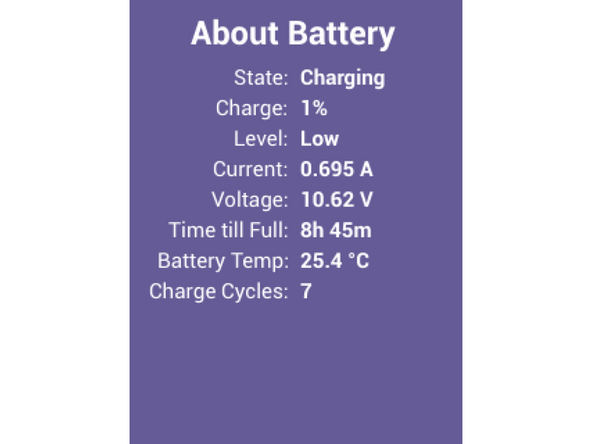
Enter the Settings menu
-
Navigate to Settings > About
-
Select About Ranger, About Battery, or About Sensor Head
-
To exit the About screen, press the LEFT ARROW
-


For further support, contact Aeroqual Support.
For further support, contact Aeroqual Support.
Cancel: I did not complete this guide.
9 other people completed this guide.

Team
