Introduction
A Rental Company can setup a Cloud Ranger lease for their customers via the Cloud Administration app.
The lease is easy to establish and remains active until it is manually ended by the Rental Company (there is no auto expiry of a lease).
Once the Rental Company receives the leased unit back from their customer they should undertake the following steps:
# Synchronize all data generated by Ranger during the lease period to Cloud via WiFi , where it will remain available in case it needs to be accessed again.
- Clear Ranger of its saved logs
- Re-calibrate the sensor head if required.
After all this, Ranger and its sensors can be leased to another customer.
Tools
Parts
No parts specified.
-
-
To start and end a lease, you must be a distributor administrator of the parent organization.
-
From the Aeroqual Cloud home screen, select Administration.
-
-
-
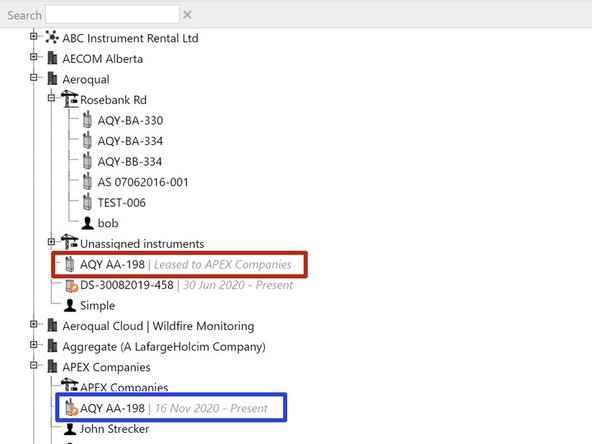
Expand the hierarchy to show the monitor you want to lease.
-
Click and drag it to the leasing company in the main window.
-
When the Move or lease instrument message appears, click Lease instrument.
-
-
-
The monitor continues to show under the parent organization, along with the grey italicized text: Leased to <company name>.
-
It also shows under the leasing company, along with the grey italicized text: <start date> - Present.
-
The icon for leased monitors has an orange arrow to differentiate it from monitors that aren't leased.
-
-
-
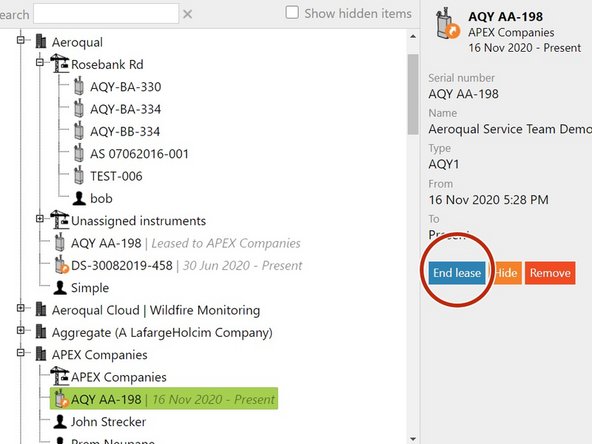
When the lease has ended, select it under the leasing company and click End lease.
-
The grey italicized text beside the company changes from <start date> - Present to <start date> - <end date>.
-
The grey italicized text: Leased to <company name> disappears beside the parent organization.
-
After a lease has ended and the monitor is returned, the customer can still use Aeroqual Cloud to view data generated during the leasing period. If they want to download historical data, they must have bought an Aeroqual Cloud licence before the lease expired.
-
Future customers who lease the monitor can't use Aeroqual Cloud to see any data belonging to a previous customer.
-
-
-
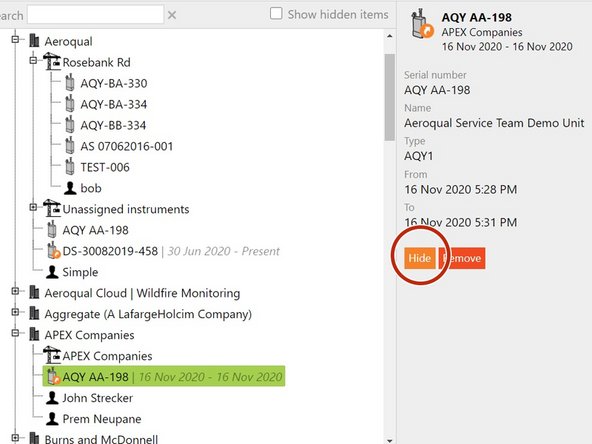
To hide a monitor that's been leased and returned, select it and click Hide.
-
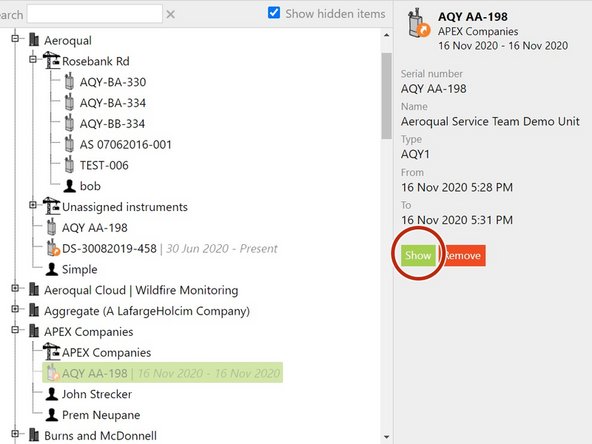
To see what items are in the hidden state, click Show hidden items. Hidden items appear in light grey type.
-
To make a hidden item permanently visible again, select it and click Show.
-
-
-
To permanently delete a lease that's ended, select it and click Remove.
-
-
-
For extra help, watch our video.
-
-
-
From the main screen, enter the Settings menu by pressing and holding the LEFT ARROW
-
-
-
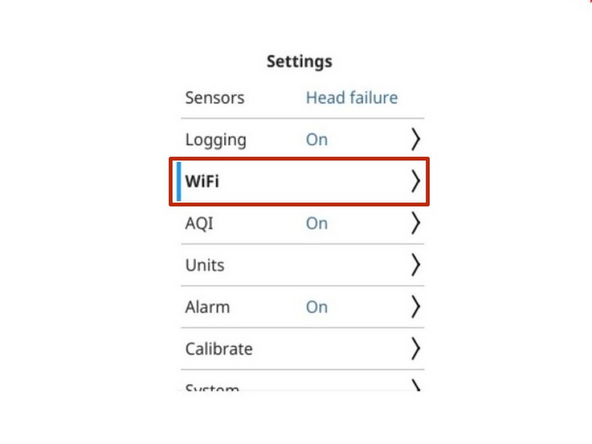
Navigate to the Wi-Fi submenu
-
Then, navigate to the Networks submenu
-
-
-
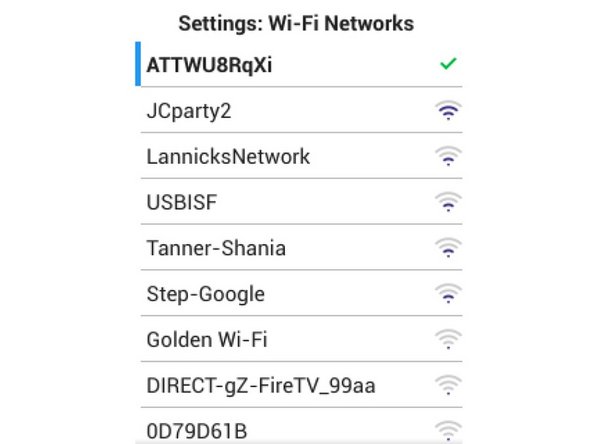
Next will appear a list of available Wi-Fi networks
-
Select the network you'd like to connect to.
-
To refresh the list of available networks, exit and re-enter the current menu.
-
Please note that the Ranger may not connect to an Open network.
-
-
-
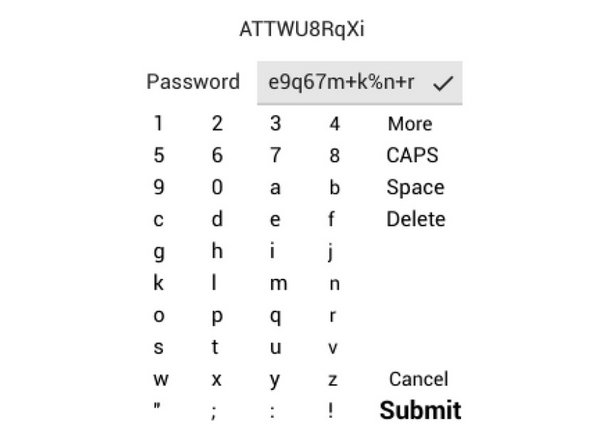
Enter the Wi-Fi password
-
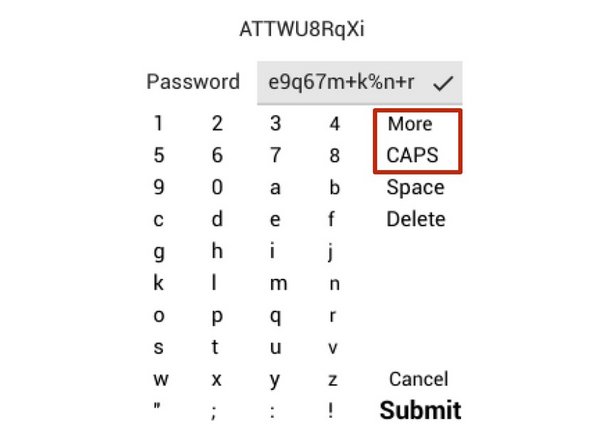
To select a capital letter, select "CAPS"
-
To select from a list of special characters, select "More"
-
Finally, select "Submit"
-
-
-
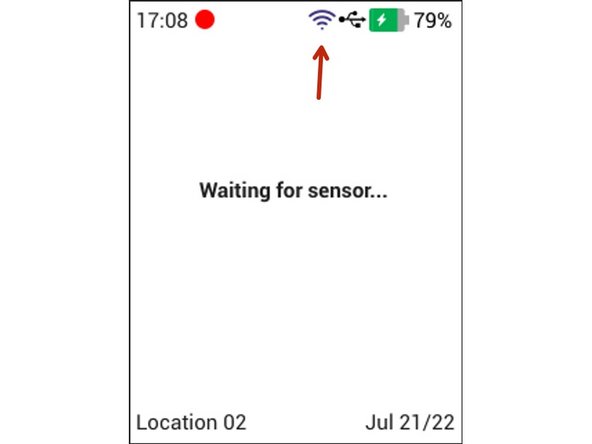
A message will appear, confirming a successful or failed connection to Wi-Fi.
-
To exit the Settings menu and return to the Main screen, press and hold the LEFT ARROW
-
Confirm that the Wi-Fi icon now appears on the Main screen
-
Ranger can remember multiple Wi-Fi networks
-
-
-
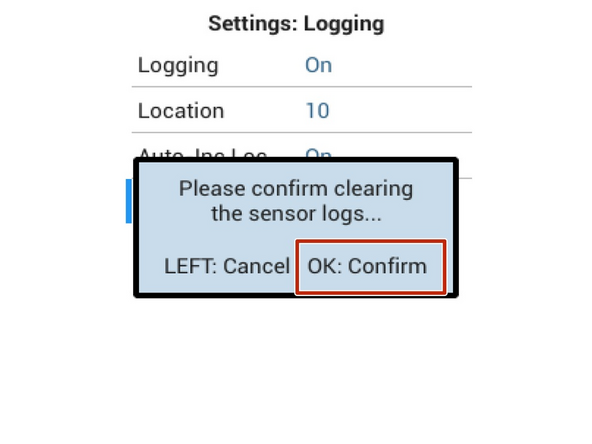
On Ranger, from the summary screen, press and hold LEFT arrow to enter the Settings menu
-
Navigate to Logging > Clear Logs and press the CIRCLE button
-
Confirm you want to clear the logs by again pressing the CIRCLE button
-
All memory of readings, locations, etc have been cleared from the device. Because the logs were previously synchronized, the logs are still available in Cloud.
-
-
-
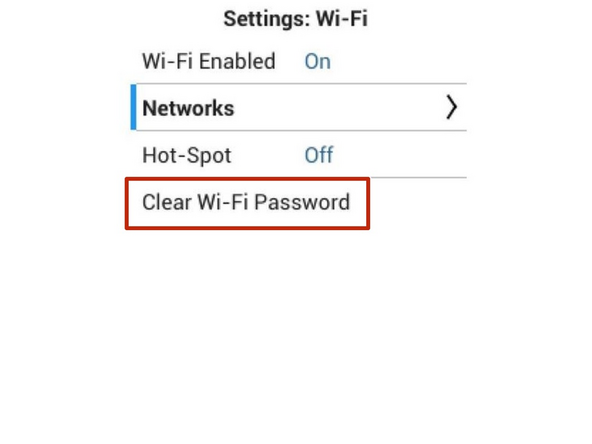
On Ranger, from the summary screen, press and hold LEFT arrow to enter the Settings menu
-
Navigate to Wi-Fi>Clear Wi-Fi Passwords and press the CIRCLE button.
-
Acknowledge the message.
-
-
-
Test the sensor head following these instructions:
-
Reference: How to test your sensor head
-
Guides: Calibration - Gas zero , Calibration - PMX zero , Calibration - Gas span, and Calibration - PMX Span
-
Reference: Span calibration
-
Reference: Sensors - VOC
-
-
-
Ammonia, perchlorethylene, ozone and particulate sensor heads can’t be span calibrated in the field, but a renter may have adjusted these values anyway.
-
For ammonia, perchloroethylene, ozone or particulate matter sensor heads, set the Span to 1.000
-


For further support, contact Technical Support.
For further support, contact Technical Support.
Cancel: I did not complete this guide.
One other person completed this guide.